In virtualization software terms, your computer is called the Host, while the other Operating Systems, or OSs for short, you install through the virtualization software, VirtualBox, are called Guests. Guests are often called Virtual Machines, or Guest VMs, or VMs for short. You can install as many Virtual Machines as you want. So you can try Ubuntu, Mint Linux, Windows Insider, Windows Server, Mac OSX, etc all from within your current Windows or Linux Host. The Virtual Machines are also self contained within one folder so you can backup or transfer the Virtual Machine to another computer. Thus you have a portable Operating System; of course, with the requirement of installing VirtualBox on the other Host computer.
Requirements: VirtualBox needs to be installed. You can follow this guide How to Install VirtualBox
Launch VirtualBox
The Settings option allows you to further customize and adjust the hardware requirements of the VM
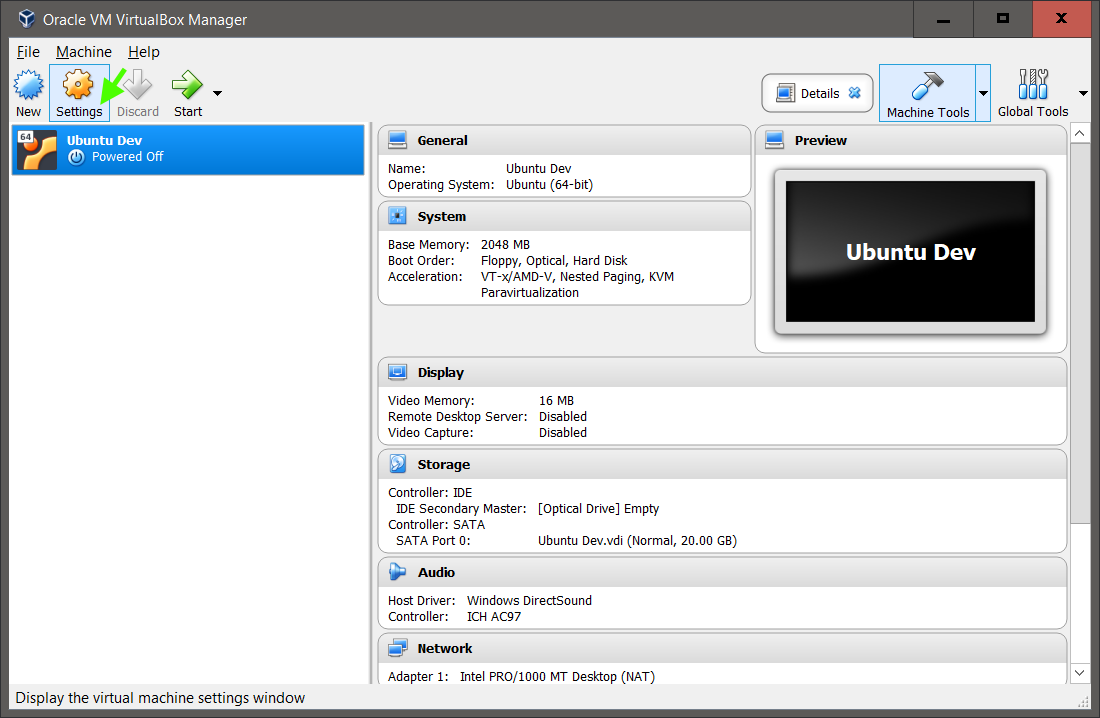
Some Settings you may want to change for most VMs follows:
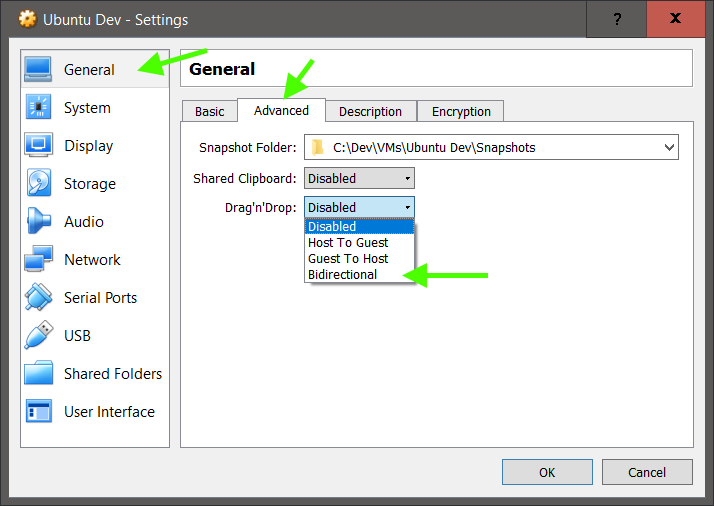
General -> Advanced
Enable Bidirectional Shared Clipboard and Bidirectional Drag’n’Drop
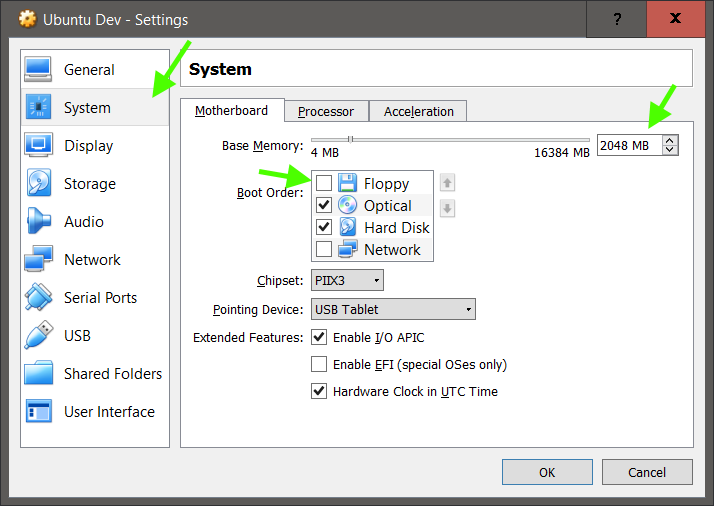
System -> Motherboard
You can adjust the memory allocation
Uncheck the Floppy from Boot Order, as it's not needed for modern OSs in VMs
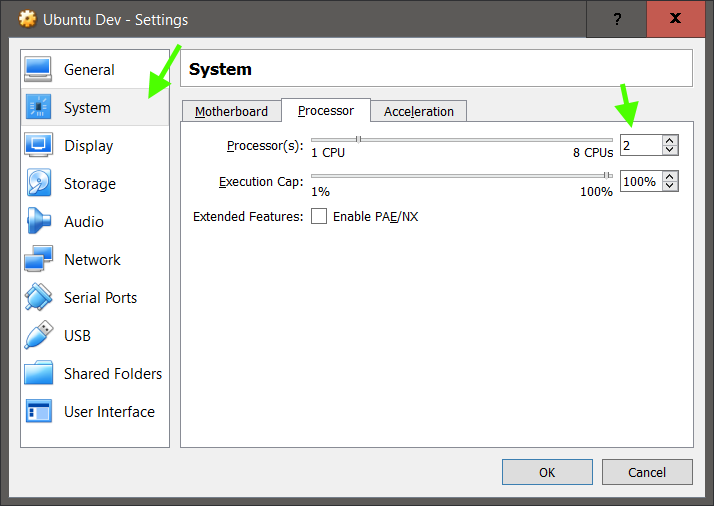
System -> Processor
You can adjust the processor usage of the VM. If you have 4 or cores on your CPU, you can allocate some of them to the VM. 2 cpus allows some multitasking to occur.
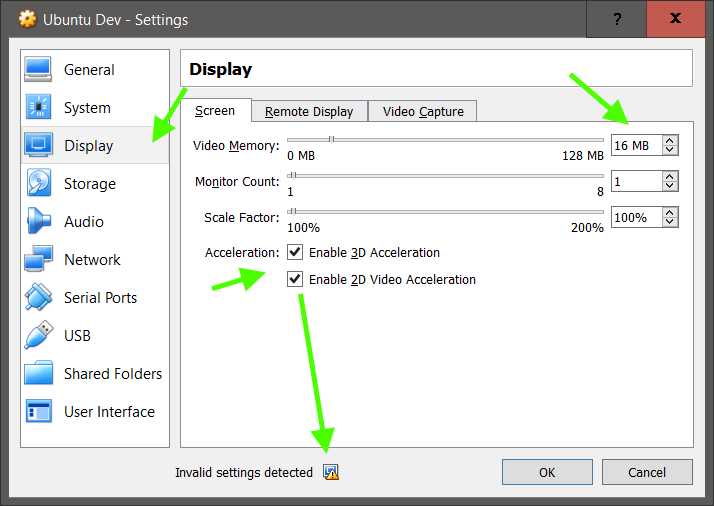
Display -> Screen
You can enable 3D and 2D acceleration. Support will vary based on your Host computer and the Guest VM. Linux VMs do not support 2D acceleration, but don’t worry, they will still work smoothly. Also, similar to System Memory, do not over allocate video memory as that can negatively impact your Host computer.
Enable Bidirectional Shared Clipboard and Bidirectional Drag’n’Drop
You can adjust the memory allocation
Uncheck the Floppy from Boot Order, as it's not needed for modern OSs in VMs
System -> Processor
You can adjust the processor usage of the VM. If you have 4 or cores on your CPU, you can allocate some of them to the VM. 2 cpus allows some multitasking to occur.
Display -> Screen
You can enable 3D and 2D acceleration. Support will vary based on your Host computer and the Guest VM. Linux VMs do not support 2D acceleration, but don’t worry, they will still work smoothly. Also, similar to System Memory, do not over allocate video memory as that can negatively impact your Host computer.
Note: You will also have to install VirtualBox Guest Additions within the Guest VM. You can follow this guide How to Install a Ubuntu Virtual Machine or view the VirtualBox docs
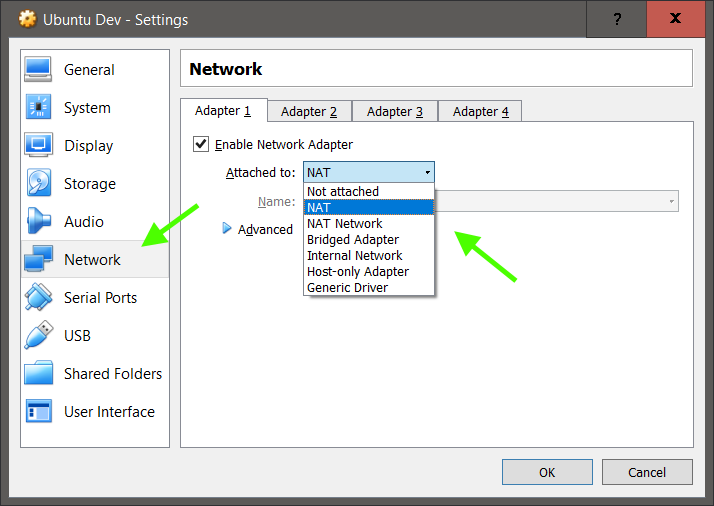
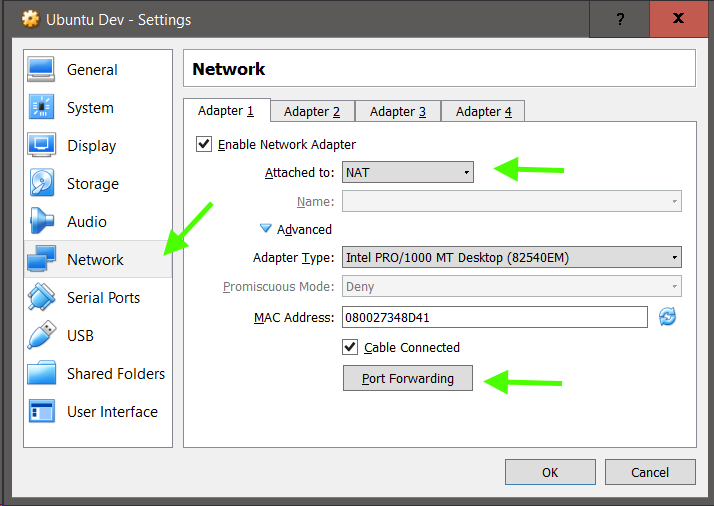
Network -> Adapter 1
The default of NAT is fine. This allows the VM to use your Host computer network for internet access, but the VM does not get it’s own IP address. Another option is Bridged Adapter which will make the VM request it’s own IP address, and thus show up on your network.
While both options should work, depending on your Host computer, one or neither option may work without searching the internet for a solution, unfortunately.
Search Bing or Google for current Virtual Box networking issues.
Network -> Adapter -> NAT -> Advance
NAT (Network Address Translation)
As the VM will not have it’s own IP address, you can set up port forwarding to access the VM Web and other servers. However, you will need the Host IP address and the VM IP address, which requires the VM to have been installed and run once.
NAT Network is a new NAT implementation for VirtualBox which you can try if NAT doesn’t work ie no internet access from the VM. You can also try different Adapter Types, though the defaults should be ok.
Network -> Adapter -> Bridged Adapter -> Advance
Bridged Adapter effectively creates a new network interface in software, thus allowing the VM to have it’s own IP address, which can facilitate the access of the VM Web and other servers.

Shared Folders -> Add a folder
Adda shared folder to facilitate copying files between the Guest VM and the Host computer.
Note: You will also have to install VirtualBox Guest Additions within the Guest VM. You can follow this guide How to Install a Ubuntu Virtual Machine or view the VirtualBox docs

Click OK and your Settings are saved. You can always update the hardware settings later, minus changing the OS once a OS is installed.

End of document. Thanks for reading.
No comments:
Post a Comment