Showing posts with label Android. Show all posts

Monday, June 29, 2020

Android Studio enable AMD Emulator

Android Studio is the official integrated development environment for Google's Android operating system, built on JetBrains' IntelliJ IDEA software and designed specifically for Android development. It is available for download on Windows, macOS and Linux based operating systems.
Source: https://en.wikipedia.org/wiki/Android_Studio

When you install Android Studio, there is an option to install the Intel Emulator (HAXM).
But if you do not have a Intel CPU, but instead have a AMD CPU, HAXM is not very useful.
So uncheck that.  But luckily, there is an option for AMD CPUs after installation.

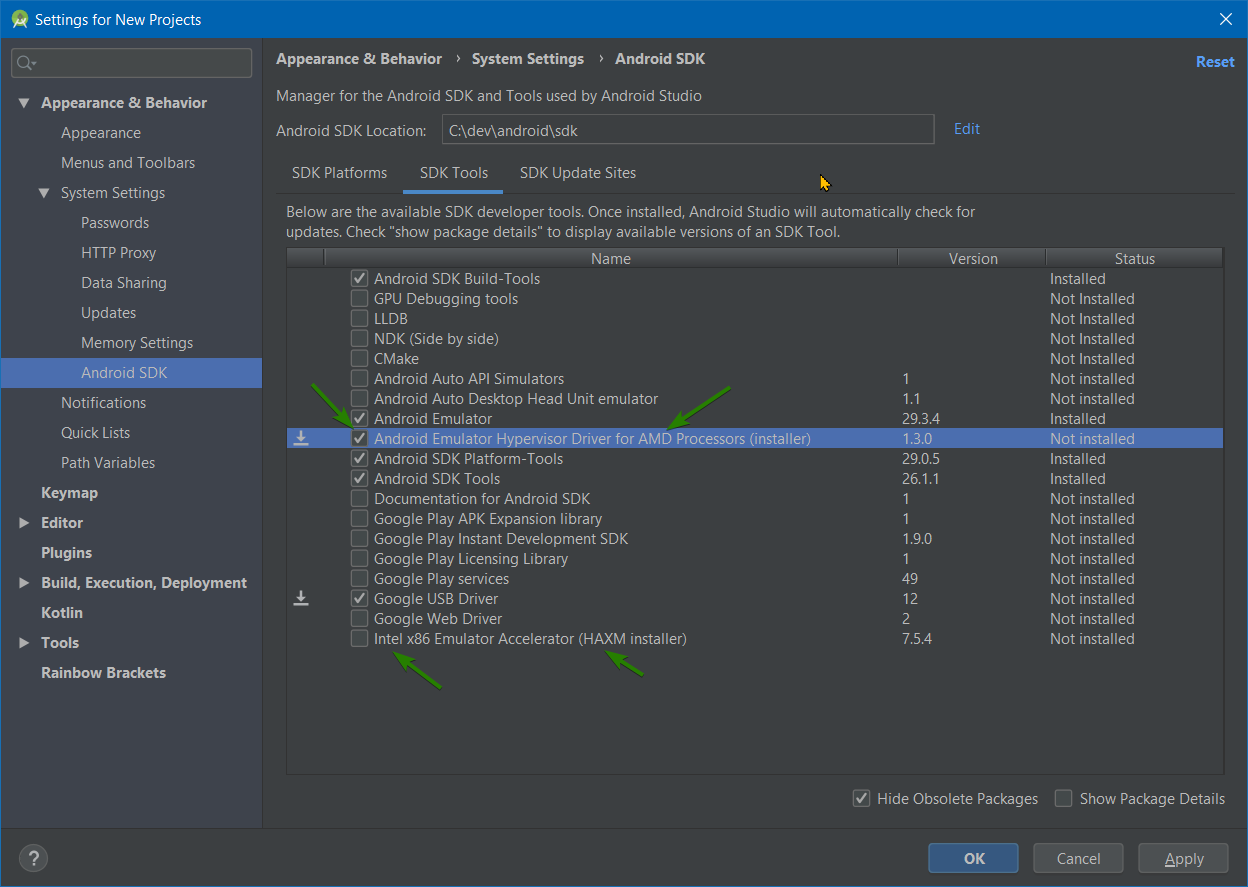
Android Studio -> Tools -> SDK Manager
SDK Tools tab


In the list, there is an option for the AMD Emulator
Android Emulator Hypervisor Driver for AMD Processors (installer)

Which "makes it possible to the emulator on AMD CPUs without needing to enable Hyper-V and with performance on par with HAXM"
Source: https://androidstudio.googleblog.com/2019/11/android-emulator-hypervisor-for-amd.html

You can also uncheck the
Intel x86 Emulator Accelerator (HXAM installer)
if you checked it during the initial install.

You may also want to check the
Google USB Driver 
if you want to later debug/test with an a phone connected via usb

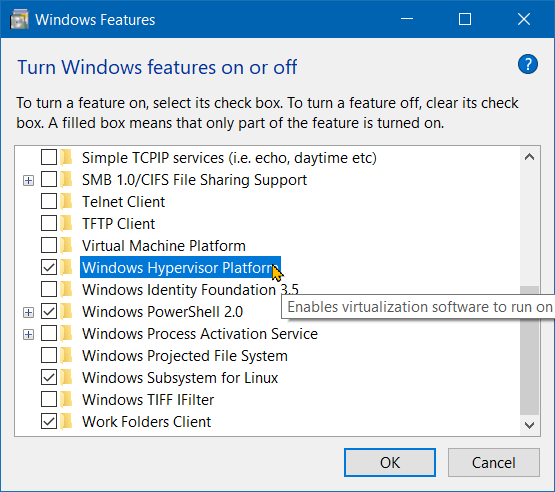
Also, you will need to enable Windows Hypervisor Platform
Note: You do not have to install the full Hypervisor VM, so you can still use VirtualBox or such.

Control Panel -> Programs and Features-> Turn Windows features on or off (left side)
Scroll down, enable Windows Hypervisor Platform

Even if not prompted to reboot on save, you need to reboot to enable the feature

You should now be able to create and launch an Android Emulator
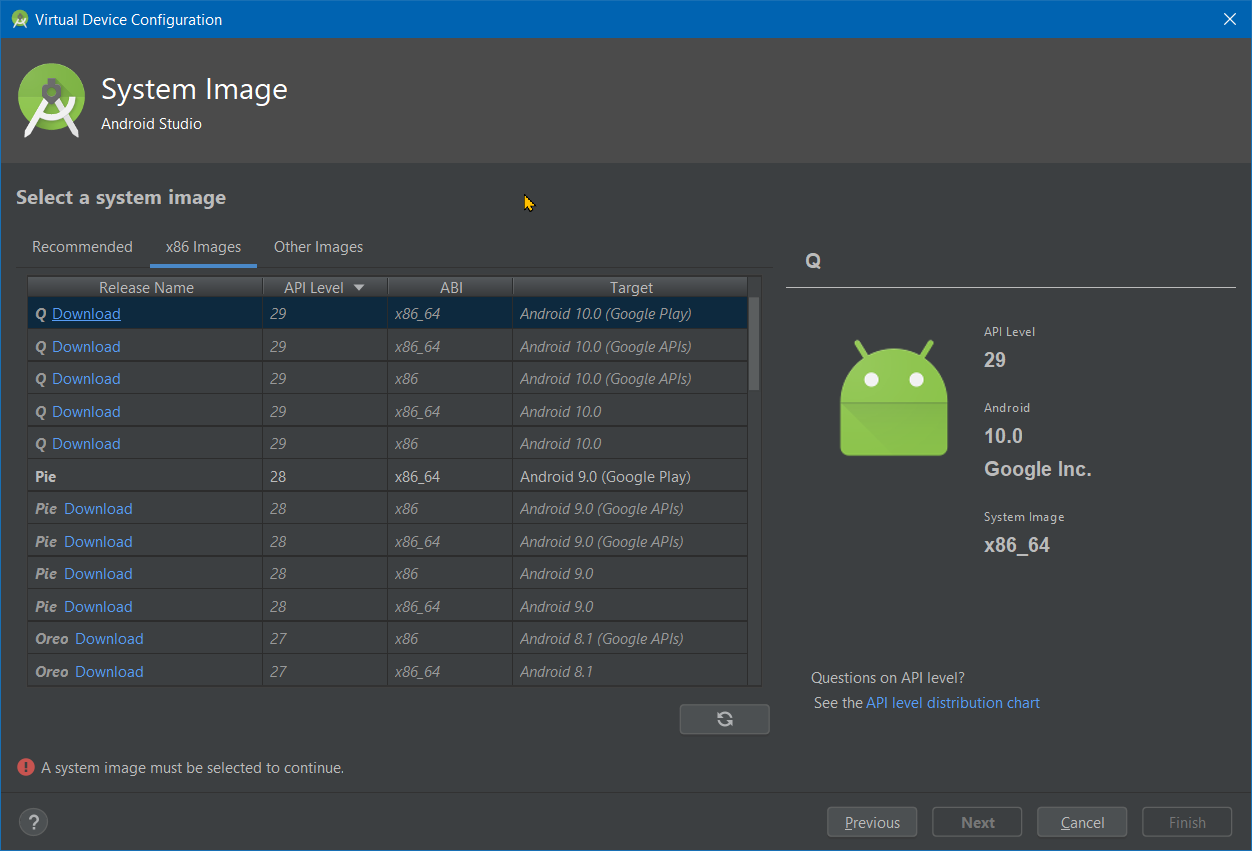
Tools -> AVD Manager
Select an x86_64 image with google play

Click Next and Finish
Note: You may still be prompted with an Intel HAXM dialog, probably a Android Studio bug.
Obviously Intel HAXM will fail to install/configure. But that is OK as the Android Emulator will still launch.
You should now have a usable Android Emulator, code away.


-End of Document-
Thanks for reading

Monday, June 8, 2020

Help Flutter find the Android SDK in a custom location

Flutter is a SDK for building high-performance, high-fidelity apps for iOS, Android, and web (tech preview) from a single codebase. The goal is to enable developers to deliver high-performance apps that feel natural on different platforms.

To build Android apps with Flutter, you will need to install the Android SDK. But if you install the Android SDK to a custom location, as you might to organize your tools, Flutter will not be able to find it and thus not work. The following resolves this issue:

The short version:
> cd c:\dev\git\flutter
> flutter doctor
> flutter config --android-sdk c:\dev\android\sdk
> flutter doctor --android-licenses
> flutter doctor

The long version:

Assuming you have followed the Flutter installation instructions
Source: https://flutter.dev/docs/get-started/install/windows

You should have the Flutter SDK extracted or git cloned in a directory, such as
> c:\dev\git\flutter

And updated the environment Path to include
c:\dev\git\flutter

And installed Android Studio, which will install the Android SDK.
The default install location is usually
c:\Users\[user]\AppData\Local\Android\sdk
But you may want a shorter and more accessible location such as
c:\dev\android\sdk
Which is what causes Flutter to be flustered to not find the Android SDK

After all those downloads and installs,
You should run flutter doctor, which validates your installation
> cd c:\dev\git\flutter
> flutter doctor

Well, the first error is Flutter cannot find the Android SDK.

If you installed the Android SDK into a custom location, such as
c:\dev\android\sdk

You will need to tell Flutter about its location,
which is not in the installation instructions.

But some internet searching yielded flutter has an option to update its config
> flutter config --android-sdk c:\dev\android\sdk
Source: https://github.com/flutter/flutter/issues/15114#issuecomment-431793370

Running flutter doctor again yields
> flutter doctor

I guess if you run a Flutter project or run the emulator you may get the license prompts then, but might as well accept them now.

> flutter doctor --android-licenses
Make sure you thoroughly read them, and dispute them if you do not agree, yup.

Running flutter doctor again yields
> flutter doctor

So all good.
Flutter knows where the Android SDK is installed.

Note: While IntelliJ IDEA Ultimate Edition can also be used for Flutter and Android development, Android Studio is gracefully made by IntelliJ so the interfaces are similar, with Android Studio obviously being more targeted toward Android development. Also most tutorials, internet how/what searches will reference Android Studio.

-End of Document-
Thanks for reading

Monday, February 26, 2018

Adding camera api to react native

React Native has a native Camera component billed as
"The comprehensive camera module for React Native. Including photographs, videos, and barcode scanning!"

Sounds cool, and the installation looks to be easy going by the instructions at
https://github.com/react-native-community/react-native-camera

Note: This guide assumes you have already built a basic react native app using
> create-react-native-app dev-app-01
or whatever cooler name you gave your app
and you want to add camera functionality to prototype an app

And you have set up your node js, react native, android sdk environment, and ejected your react native app; if not you can follow the guide Eject your react native app!

And the adventure begins:
> npm install react-native-camera --save

That should work
> react-native link react-native-camera

Try running it
> react-native run-android

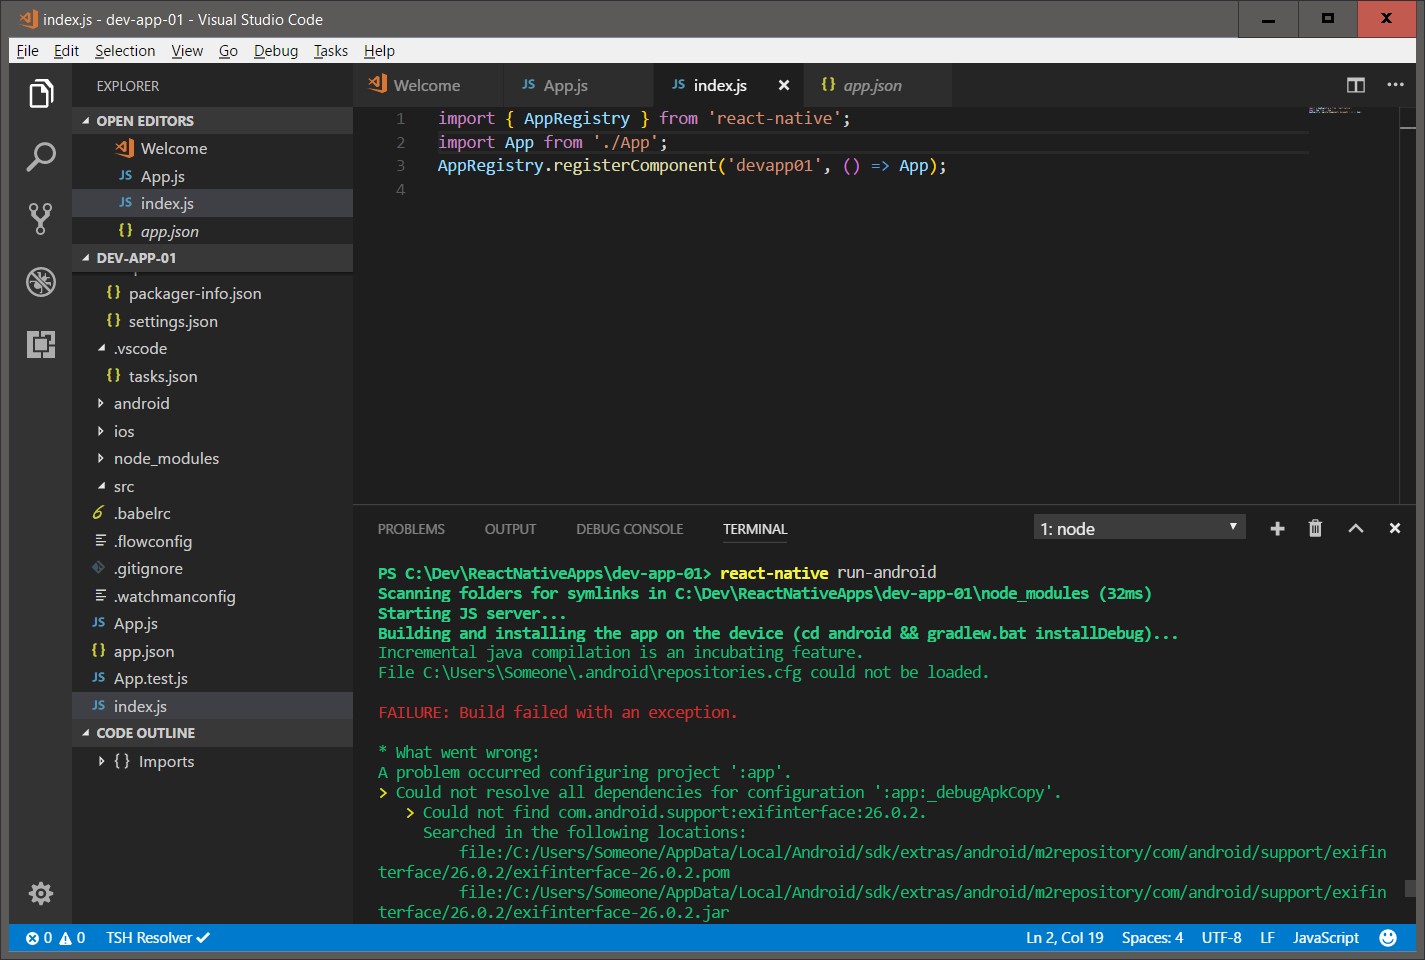
And the first Error #1
File C:\Users\[username]\.android\repositories.cfg could not be loaded.

To confirm that the automatic install and link methods did the right things,
read over the manual instructions to install on android (repeated below)
https://github.com/react-native-community/react-native-camera#android
Note: I had to perform steps 5 and 6; Steps 1 through 4 were done by the link command
1. > npm install react-native-camera --save
2. Open up `android/app/src/main/java/[...]/MainApplication.java
    Add import com.lwansbrough.RCTCamera.RCTCameraPackage; to the imports at the top of the file
    Add new RCTCameraPackage() to the list returned by the getPackages() method. Add a comma to the previous item if there's already something there.
3. Append the following lines to android/settings.gradle:
    include ':react-native-camera'
    project(':react-native-camera').projectDir = new File(rootProject.projectDir, '../node_modules/react-native-camera/android')

4. Insert the following lines inside the dependencies block in android/app/build.gradle:
    compile project(':react-native-camera')
5. Declare the permissions in your Android Manifest (required for video recording feature)
    <uses-permission android:name="android.permission.RECORD_AUDIO"/>
    <uses-permission android:name="android.permission.READ_EXTERNAL_STORAGE" />
    <uses-permission android:name="android.permission.WRITE_EXTERNAL_STORAGE" />

6. Add jitpack to android/build.gradle
    allprojects {
        repositories {
            maven { url "https://jitpack.io" }
        }
     }


Try running  again
> react-native run-android

And the same Error #1
File C:\Users\[username]\.android\repositories.cfg could not be loaded.
So create an empty file
C:\Users\[username]\.android\repositories.cfg

Note: Make sure you already have the android emulator running
Open Android Studio
Tools -> Android -> ADV Manager aka Android Virtual Device -> Start

Try running  again
> react-native run-android

And Error #2
> Could not resolve all dependencies for configuration ':app:_debugApkCopy'.
  > Could not find com.android.support:exifinterface:26.0.2.

Manually add the dependencies to add the missing libs
Browse to
c:\Dev\ReactNativeApps\dev-app-01\android\app\build.gradle
And add the dependencies
dependencies {
  compile 'com.android.support:exifinterface:26.0.2'
  compile "com.android.support:support-v4:26.0.1"
  compile fileTree(dir: "libs", include: ["*.jar"])
  compile "com.android.support:appcompat-v7:23.0.1"
  compile "com.facebook.react:react-native:+"  
  compile project(':react-native-camera')
}

To add it
Open Android Studio
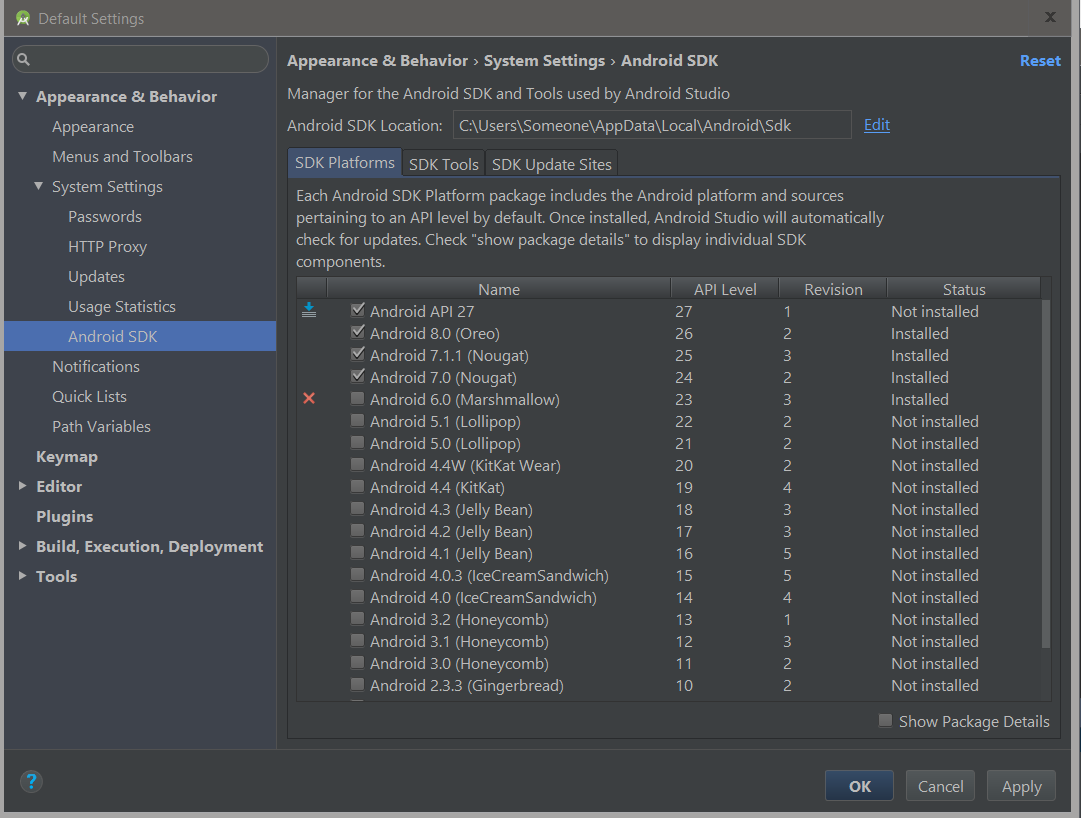
Tools -> Android -> SDK Manager
Ensure the latest android versions are enabled, and save

Try running  again
> react-native run-android

And again Error #2
You can also delete the gradle cache which may be stale from the manual android instructions above
Navigate to
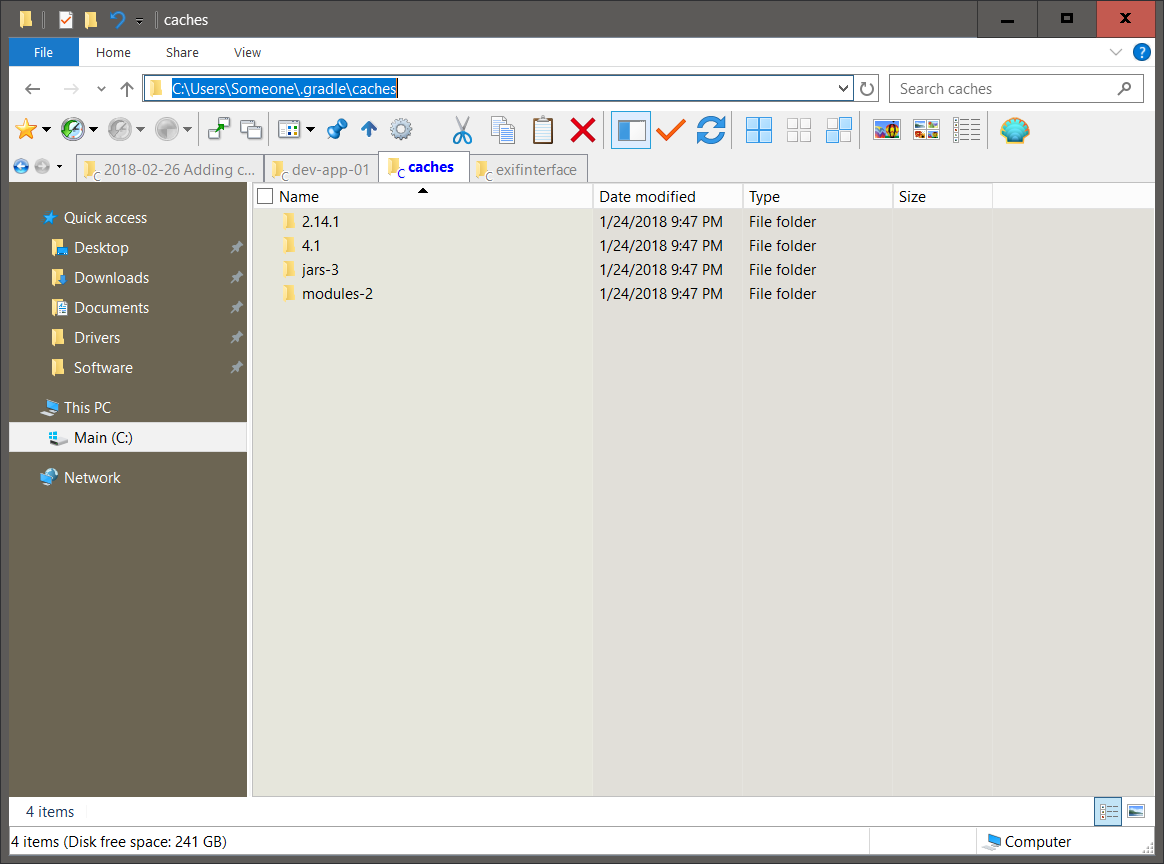
C:\Users\[username]\.gradle\caches
And delete all folders
Note: Gradle is a build system used by Google for android
Gradle is similar in concept to Maven, Composer, Npm, Make, etc

Try running  again
> react-native run-android

React native via gradle will re-download all the required java packages that are set in the build.gradle

And again Error #2

Well, let’s look at the build.gradle file on GitHub for the camera project
Ok, the repositories and dependencies sections are different from the main documentation.
Let’s try them
repositories {
 mavenCentral()
 maven {
  url 'https://maven.google.com'
 }
 maven { url "https://jitpack.io" }
}

dependencies {
 compile 'com.facebook.react:react-native:+'
 compile "com.google.zxing:core:3.2.1"
 compile "com.drewnoakes:metadata-extractor:2.9.1"
 compile 'com.google.android.gms:play-services-vision:+'
 compile "com.android.support:exifinterface:26.0.2"
 compile 'com.github.react-native-community:cameraview:df60b07573'
}

Try running  again
> react-native run-android

And Error #3
> Manifest merger failed : Attribute meta-data#android.support.VERSION@value value=(26.0.2) from [com.android.support:exifinterface:26.0.2] AndroidManifest.xml:25:13-35
is also present at [com.android.support:support-v4:26.0.1] AndroidManifest.xml:28:13-35 value=(26.0.1).
Suggestion: add 'tools:replace="android:value"' to <meta-data> element at AndroidManifest.xml:23:9-25:38
to override.

Going by the Q&A section of the documentation
https://github.com/react-native-community/react-native-camera#q--a

Comment out the dependency
  compile 'com.google.android.gms:play-services-vision:+'

Try running  again
> react-native run-android

And Error #4
Error: Cannot create directory C:\Dev\ReactNativeApps\DevApp02\android\app\build\intermediates\incremental\mergeDebugResources\merged.dir\values

Perhaps this exceeds window directory length
So navigate there and create it manually
C:\Dev\ReactNativeApps\DevApp02\android\app\build\intermediates\incremental\mergeDebugResources\merged.dir
Values

Try running  again
> react-native run-android

And again Error #4

So try deleting the build folder
C:\Dev\ReactNativeApps\DevApp02\android\app\build\

Hmm .. back to Error #3
Going by the Q&A section of the documentation
https://github.com/react-native-community/react-native-camera#q--a
exclude group: "com.android.support"
And force exifinterface:26.0.2

repositories {
mavenCentral()
maven { url 'https://maven.google.com' }
maven { url "https://jitpack.io" }
}

dependencies {
  compile "com.android.support:appcompat-v7:23.0.1"
  compile 'com.facebook.react:react-native:+'

  compile "com.google.zxing:core:3.2.1"
  compile "com.drewnoakes:metadata-extractor:2.9.1"
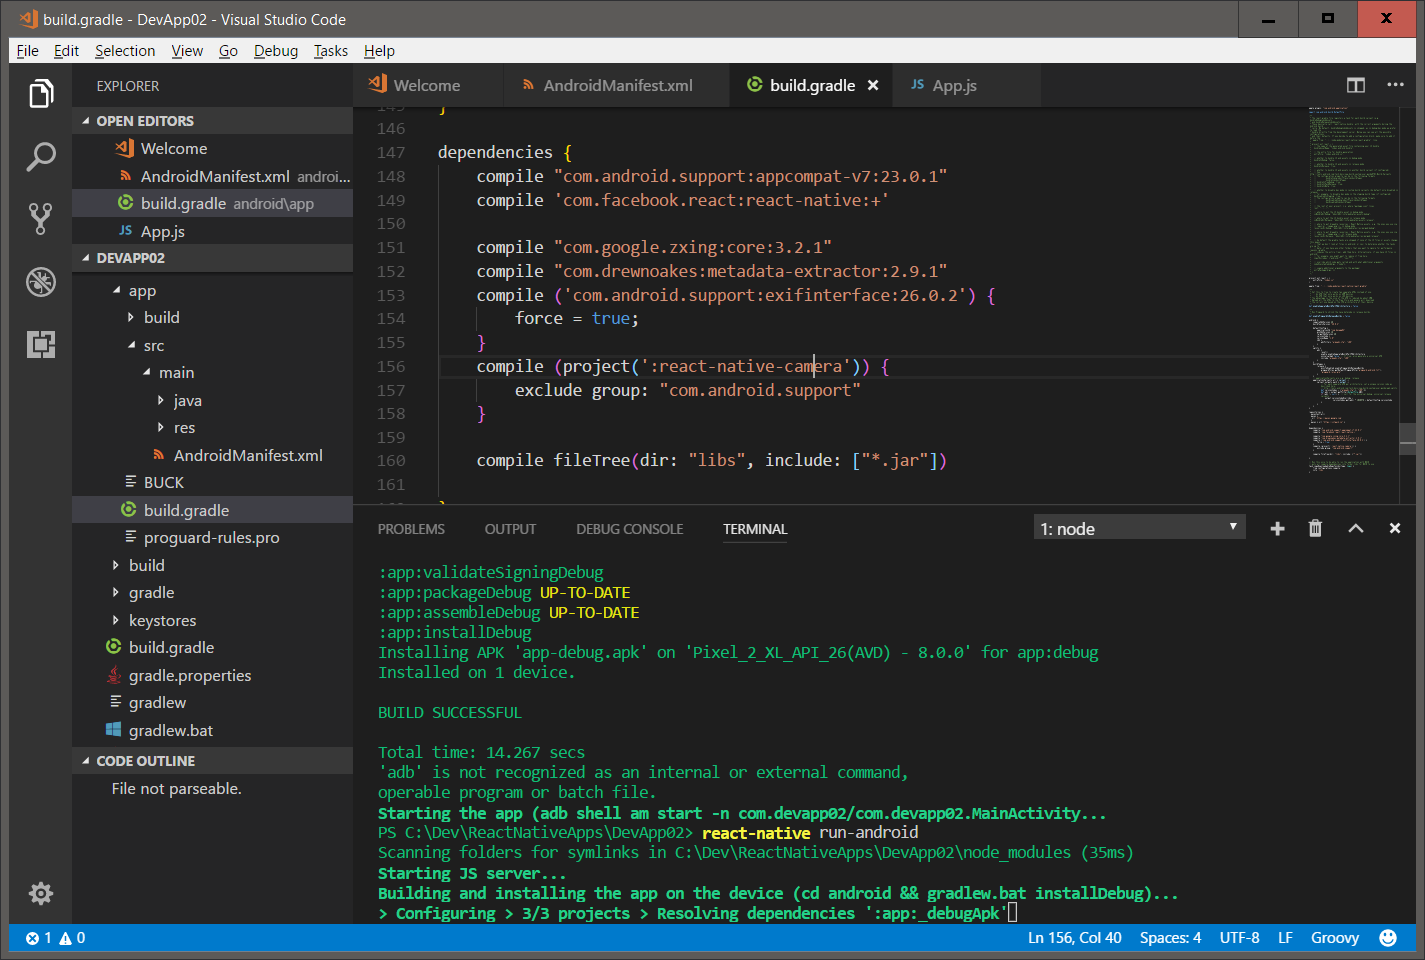
  compile ('com.android.support:exifinterface:26.0.2') {
      force = true;
  }
  compile (project(':react-native-camera')) {
      exclude group: "com.android.support"
  }

  compile fileTree(dir: "libs", include: ["*.jar"])
}

Try running  again
> react-native run-android

Well, no console errors
So try to launch the basic default app .. and that now works again
Optimistic -sign-

Add the camera example code from the main doc
https://github.com/react-native-community/react-native-camera#usage
Try running again
> react-native run-android

And Error #5
The react native red screen

Instead of trying to debug that, let’s try using the example app checked into GitHub
https://github.com/react-native-community/react-native-camera/blob/master/RNCameraExample/App.js
Try running  again
> react-native run-android

And Error #6
bundling failed: Error: Unable to resolve module `./assets/ic_photo_camera_36pt.png`

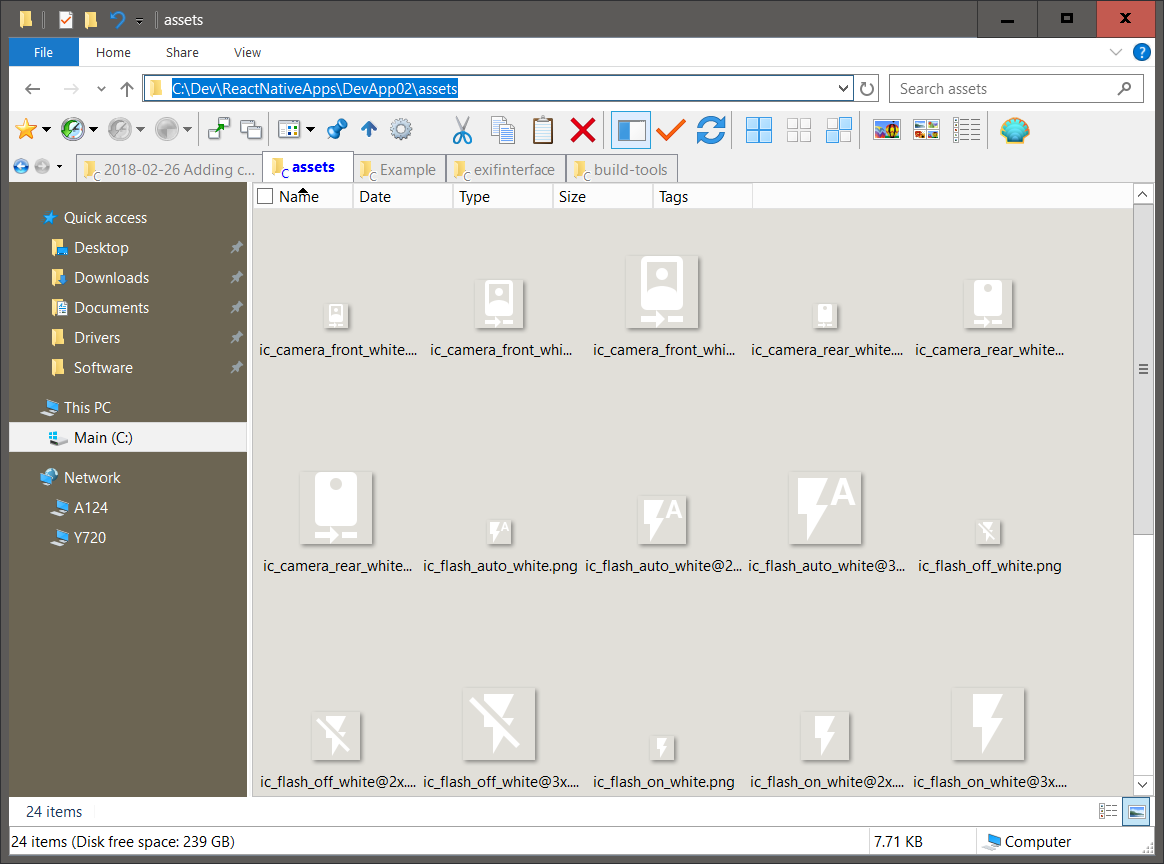
So browse the GitHub project, and there is an assets/ directory
Copy all those to your project
It is easier to git clone the project or download it as a zip and copy the assets/ folder over
https://github.com/react-native-community/react-native-camera

Try running  again
> react-native run-android

And Error #7
cannot load index.android.js

Per a git issue thread

adb reverse tcp:8081 tcp:8081

Adb was not in my path, so I had to
C:\Users\[username[\AppData\Local\Android\sdk\platform-tools\adb reverse tcp:8081 tcp:8081
Try running  again
> react-native run-android

And Error #8
A white screen

Trying another option in the git issue thread
https://github.com/facebook/react-native/issues/15388#issuecomment-356937491

Shake the phone -sign- to show developer options for react native
Choose Dev Settings
Tap Debug server host and port for device
Enter your laptops IP and port 8081

Note: You can get your IP from the command prompt
> ipconfig

Try running  again
> react-native run-android

And hey, it actually works.
Cool.

There was a lot of environment initialization and fixing from the joys of rapid development libraries and multiple complex build tools, but at least the camera api is available and -currently- works.

Now to actually designing an app.
Till next time.

End of document. Thanks for reading.

Monday, February 19, 2018

Eject your react native app!

Ejecting your react native app just means you can use native java and objective c code and components in your react native app

Background:
While this started as a 'simple' guide to install a camera component in react native, it ends up being a guide to eject your react native app and run it in the android emulator, as preparation to using the camera component.

Note: This guide assumes you have already built a basic react native app using
> create-react-native-app dev-app-01
or whatever cooler name you gave your app and you want to add camera functionality to prototype an app

Impetuous:
React Native has a native Camera component billed as 
"The comprehensive camera module for React Native. Including photographs, videos, and barcode scanning!"
Sounds cool, and the installation looks to be easy going by the instructions at

And the adventure begins:
> npm install react-native-camera --save

That should work
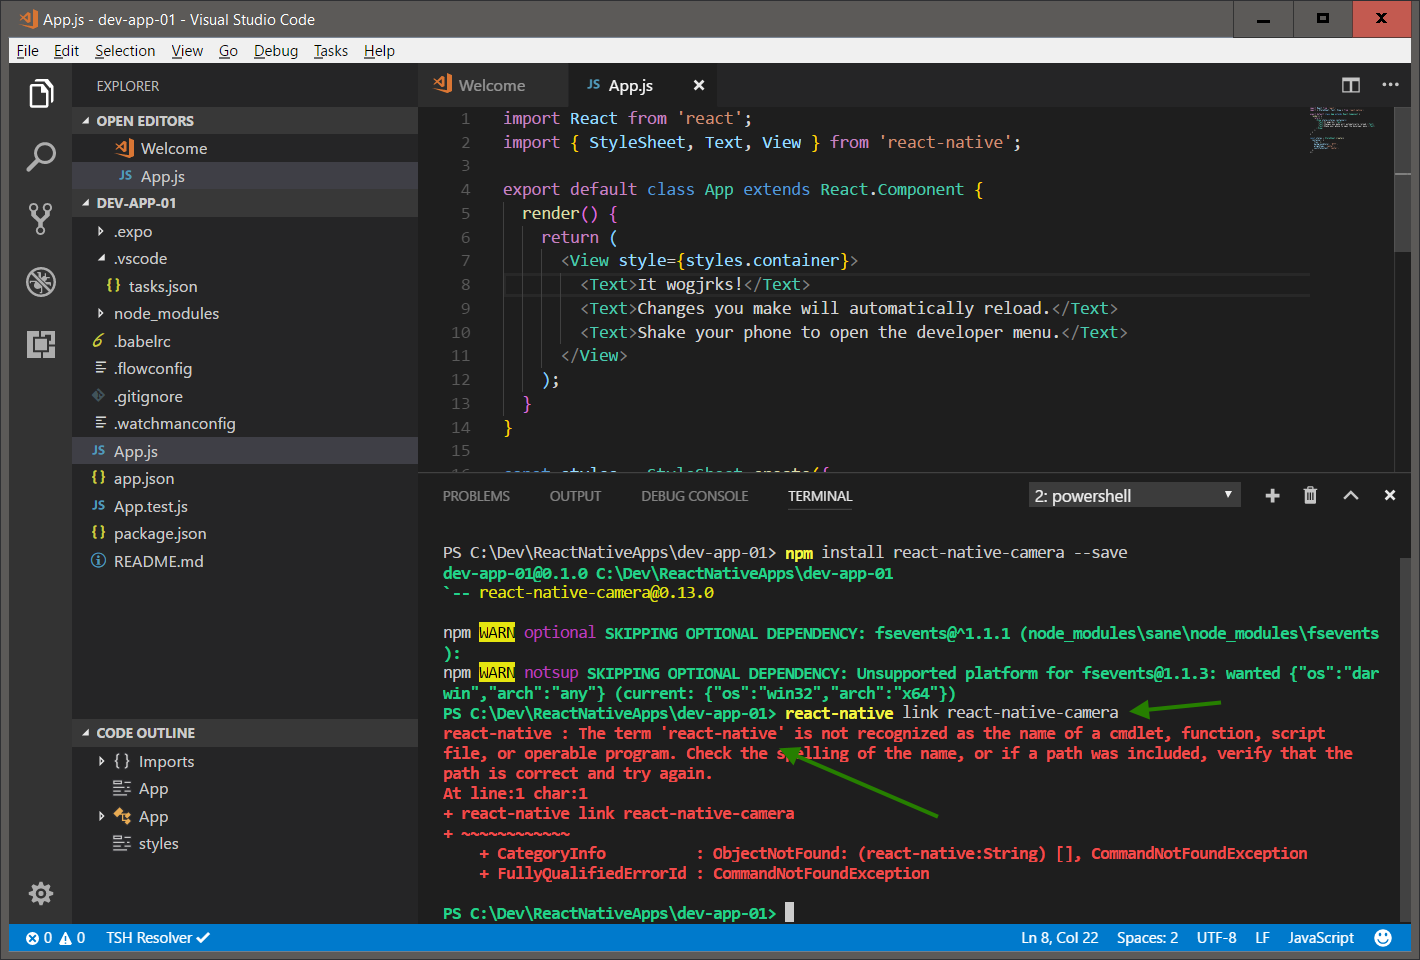
> react-native link react-native-camera

And the first Error #1
The term 'react-native' is not recognized


You need to install react native global
> npm install -g react-native-cli

And the next Error #2
`react-native link` can not be used in Create React Native App projects.
So let's go with the manual instructions at

First, to use native components, you have to 'eject' your project
Ejecting just means you can use native java and objective c code and components in your app
> npm run eject

This will create android and ios folders where you can customize the java and objective c code directly, or in the case of trying to use the camera component, add components which are written in java and objective c

Answer a few questions such as what's your project name.
I choose to not create an Expo account at this time, as uhg another account, and their site was not responding tonight.  While using the Expo app on your phone is easier than manually copying your app from your notebook to your phone, the android emulator should work for now for quick testing.> npm start

And the next Error #3
will complain that you are running a react native app so now you have to start with android

trying again
>  react-native run-android

And the next Error #4
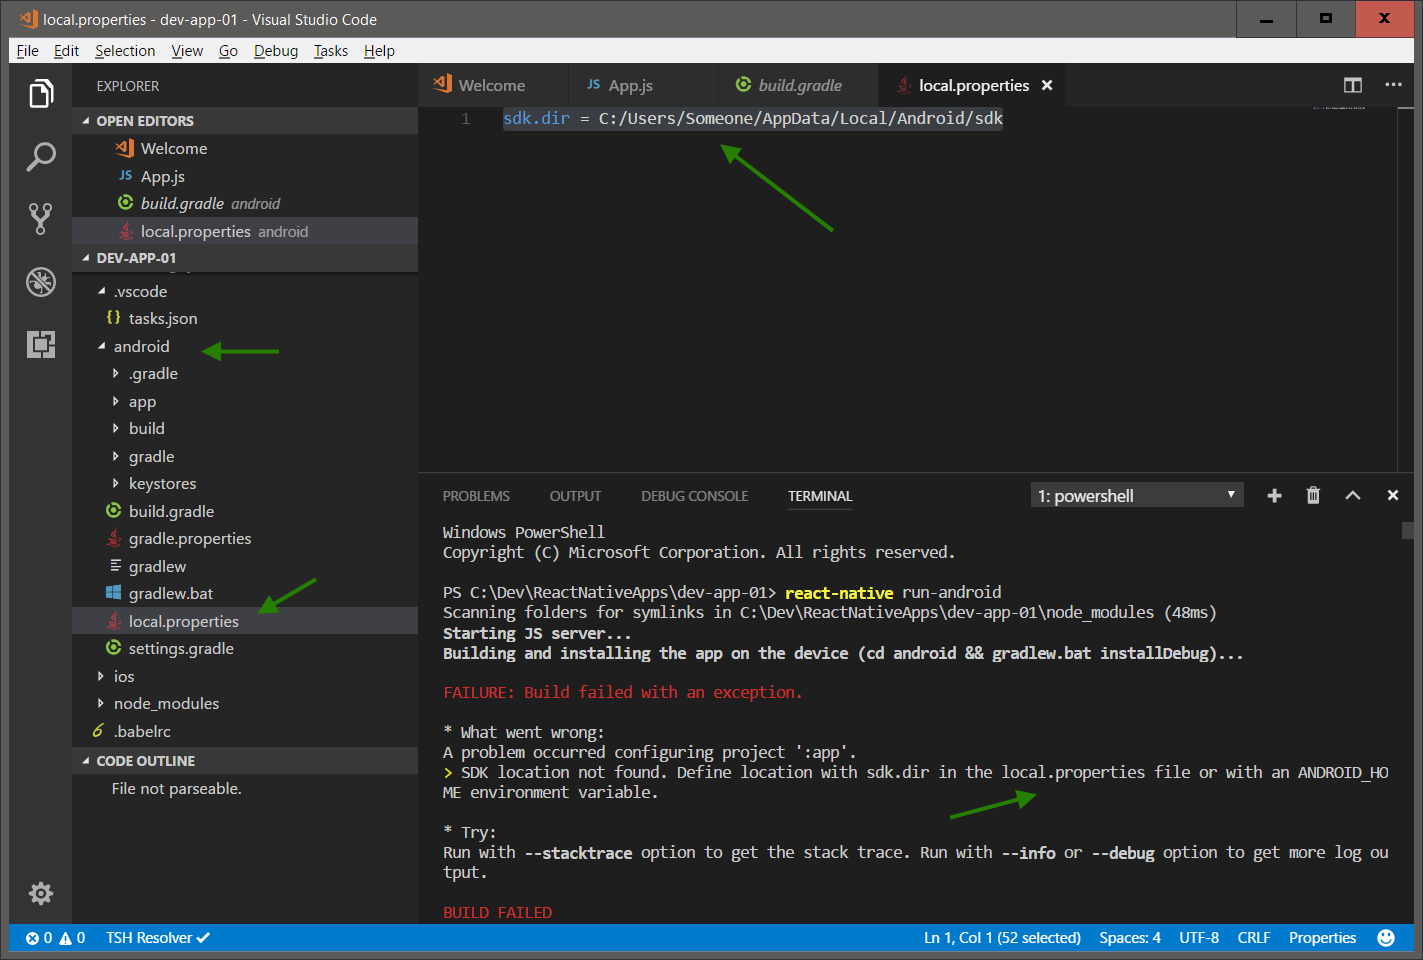
SDK location not found. Define location with sdk.dir in the local.properties file or with an ANDROID_HOME environment variable.

So now you have to install android studio to get the android sdk
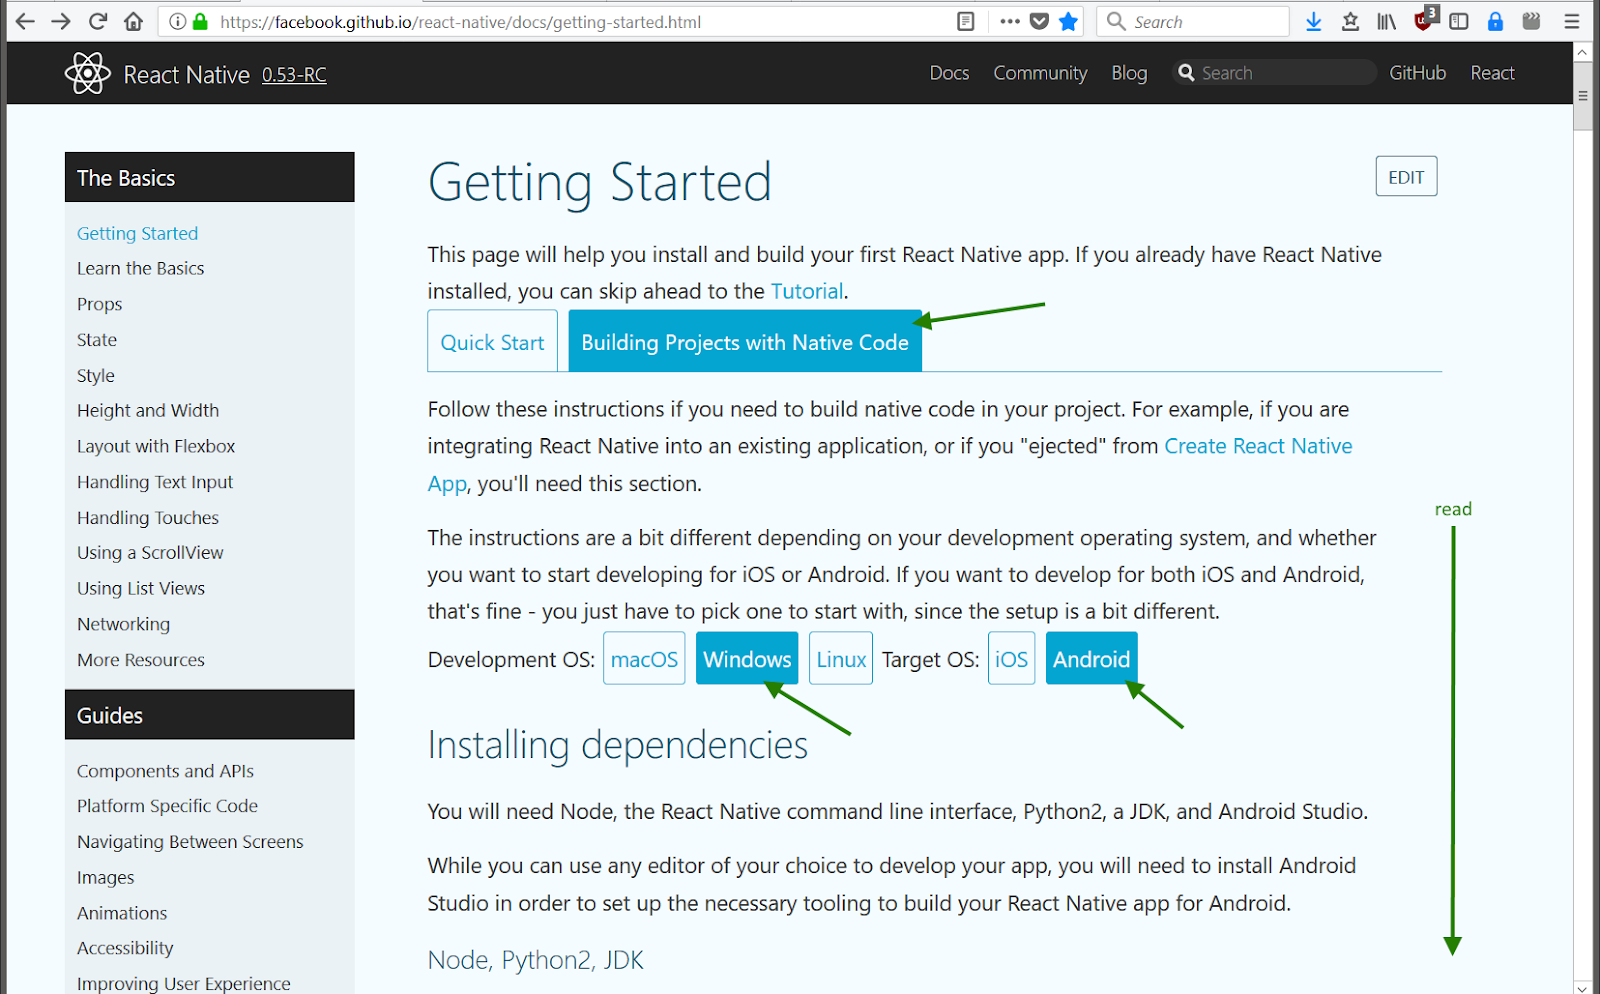
It's best to follow the full page of instructions at

Make sure you click the appropriate buttons
'Building Projects with Native Code'
'Windows'
'Android'
And then follow their lengthy instructions.


  • Download and install android studio (683MB + GBs for SDKs and emulators), 
  • Make sure you have the appropriate SDKs checked - the defaults worked for me
  • And add a PATH variable
trying again
>  react-native run-android

And the Error #4 again
SDK location not found. Define location with sdk.dir in the local.properties file or with an ANDROID_HOME environment variable.

Double check that you entered the PATH in Android Studio
But that still didn't work for me,

So I created a local.properties file in the android/ folder and added
> sdk.dir = C:/Users/[username]/AppData/Local/Android/sdk

trying again
>  react-native run-android

And the next Error #5
Could not find tools.jar. Please check that C:\Program Files\Java\jre1.8.0_151 contains a valid JDK installation.

Which means you need to install the Java Development Kit aka JDK
Which makes sense as the java code will need to be compiled
Download and install the JDK

trying again
>  react-native run-android

And the next Error #6
com.android.builder.testing.api.DeviceException: No connected devices!
Which means the android emulator needs to be running
So
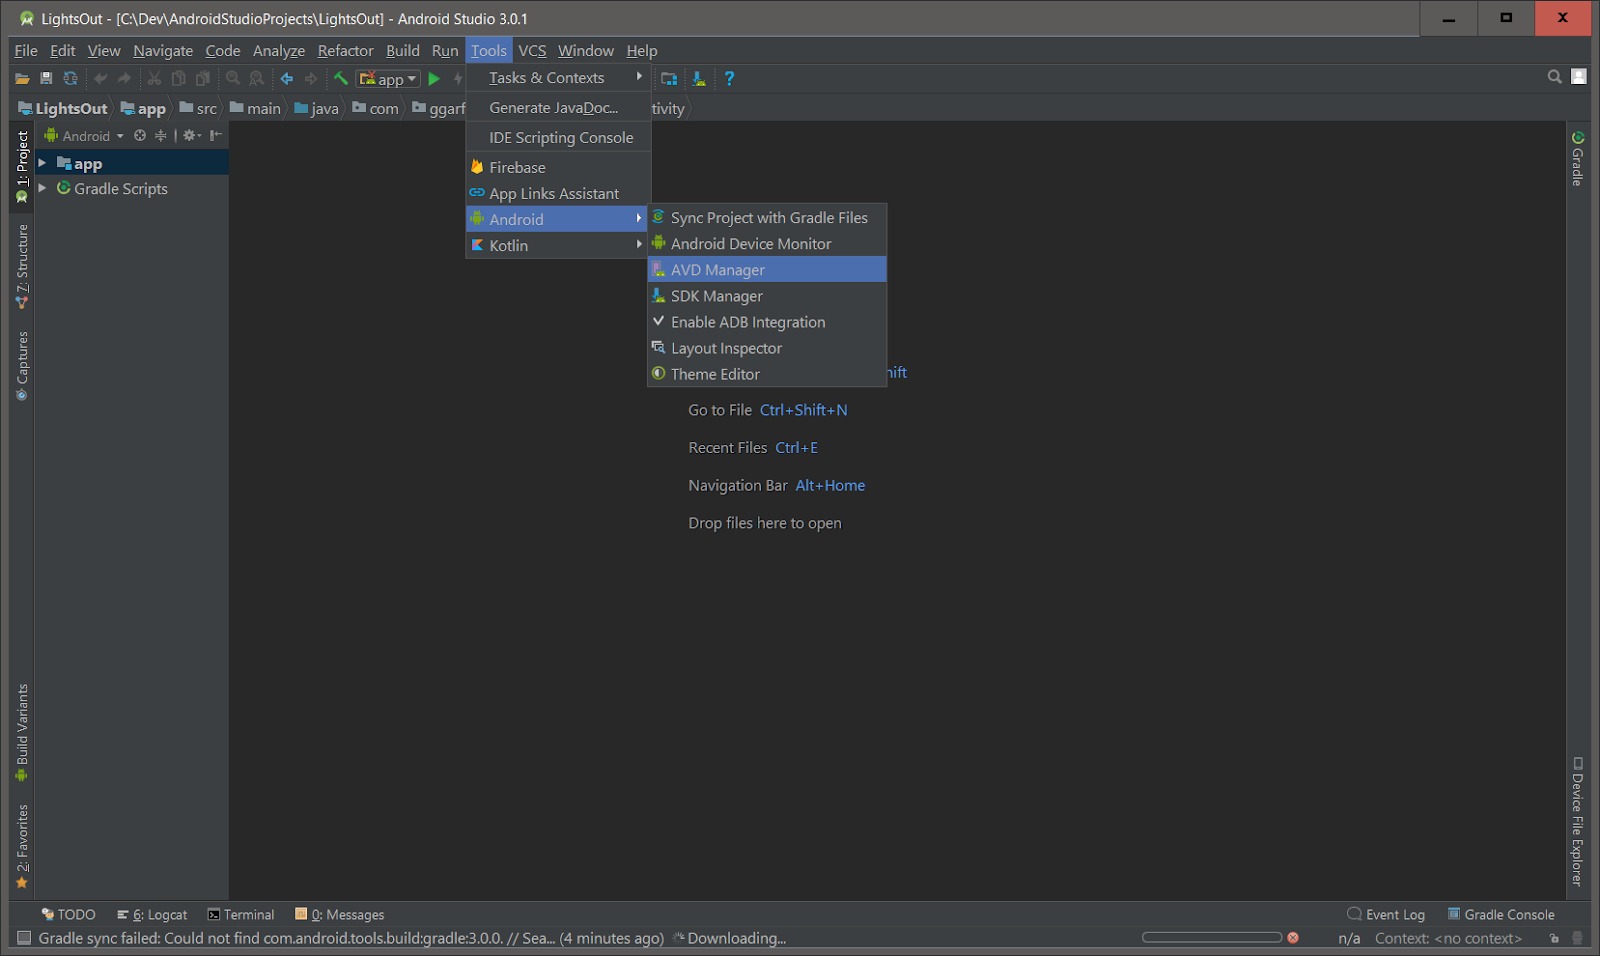
Android Studio
Tools -> Android -> ADV Manager aka Android Virtual Device

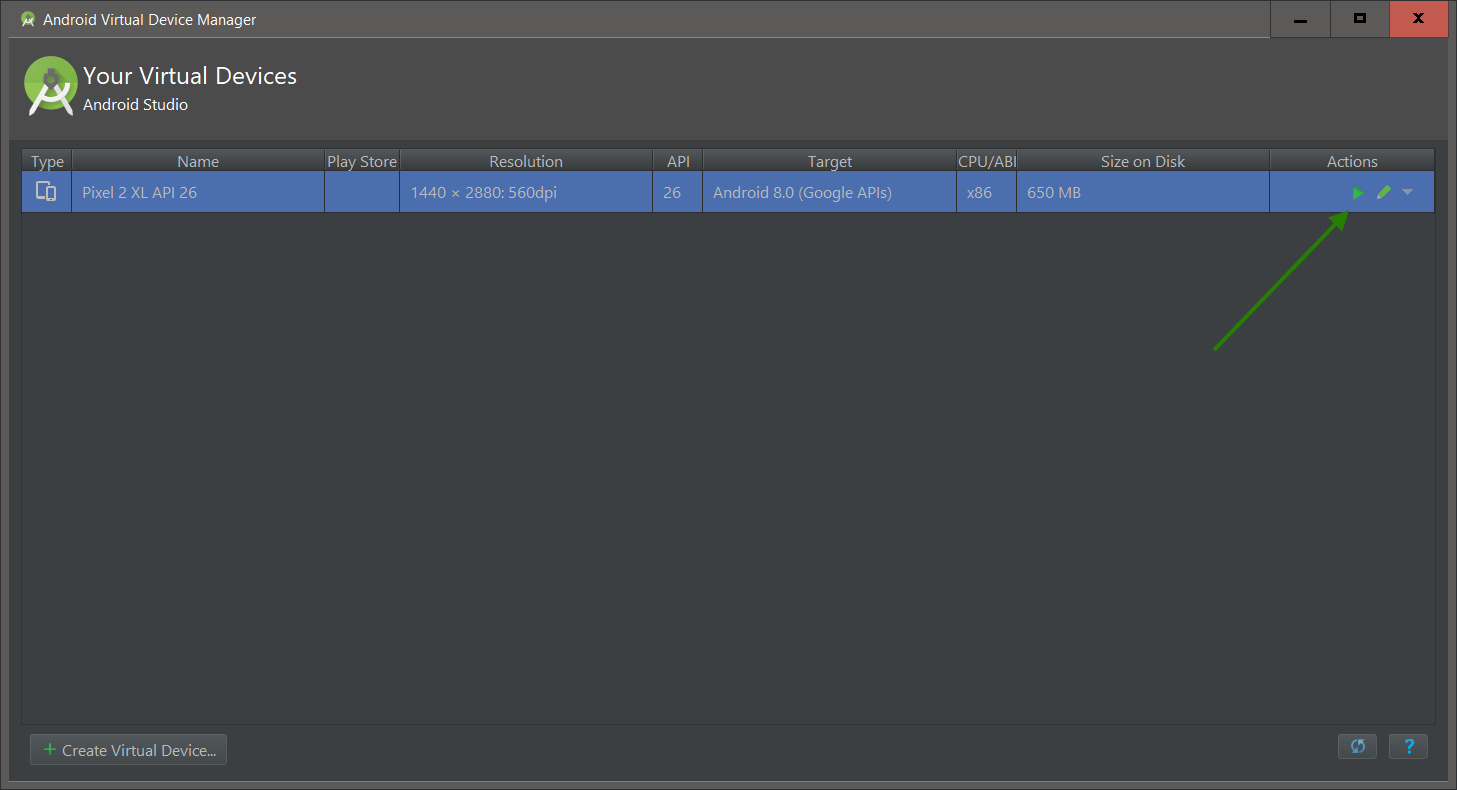
Create a new device
Choose Pixel 2 XL since that is fairly new
Next Next Next, just using the defaults

Click the Play button

Wait for it..
And the android emulator should be running

trying again
>  react-native run-android

Hmmm, no immediate errors
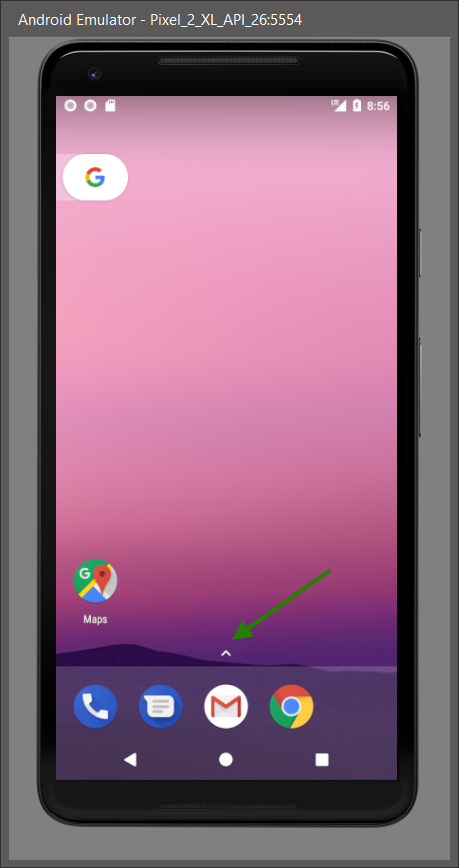
Click the app drawer (the up caret above the gmail icon)
Your app should be in the top right
Drag it to the home screen and click


And the next Error #7
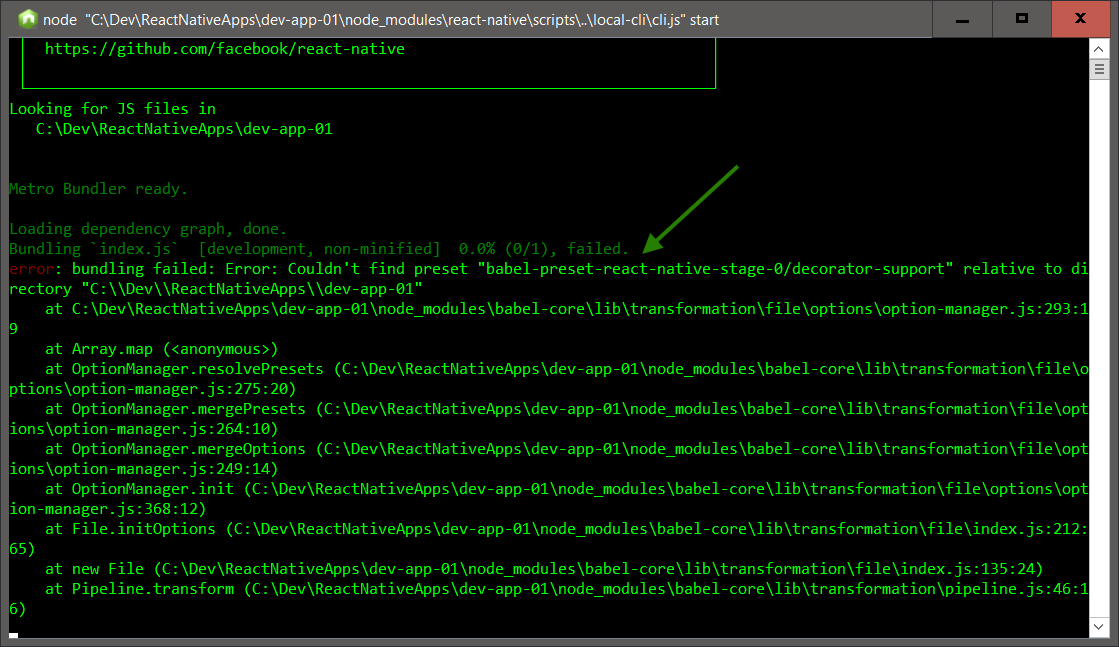
Error: Couldn't find preset "babel-preset-react-native-stage-0/decorator-support" relative to directory


Note: Babel is a JavaScript transpiler. Babel enables us to write modern ES6/7 JavaScript that will be "transpiled" to widely-supported ES5 JavaScript.

So install the babel preset

> npm install babel-preset-react
> babel-preset-react-native-stage-0

trying again
>  react-native run-android

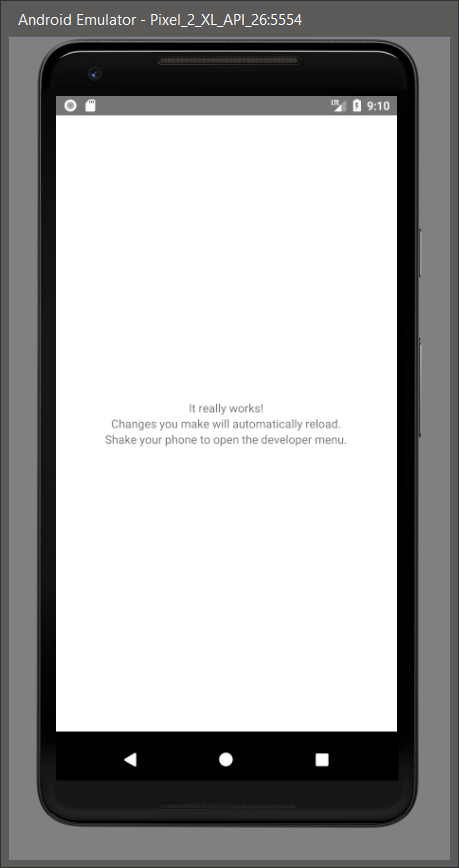
And the next Err .. no wait, it works!
Nice


With the android emulator window active, press Ctrl+M to bring up the react native context menu
Select Enable Hot Reloading

Make a change to some text in your app.js
And its updated in the phone app
Cool


OK, I didn't get to the actual camera part this time,
but there was a lot of environment initialization, and the basics seem to be working.
So till next time..


End of document. Thanks for reading.