While this started as a 'simple' guide to install a camera component in react native, it ends up being a guide to eject your react native app and run it in the android emulator, as preparation to using the camera component.
> create-react-native-app dev-app-01
or whatever cooler name you gave your app and you want to add camera functionality to prototype an app
React Native has a native Camera component billed as
"The comprehensive camera module for React Native. Including photographs, videos, and barcode scanning!"
Sounds cool, and the installation looks to be easy going by the instructions at
And the adventure begins:
That should work
And the first Error #1
The term 'react-native' is not recognized
You need to install react native global
And the next Error #2
`react-native link` can not be used in Create React Native App projects.
So let's go with the manual instructions at
First, to use native components, you have to 'eject' your project
Ejecting just means you can use native java and objective c code and components in your app
Sounds cool, and the installation looks to be easy going by the instructions at
And the adventure begins:
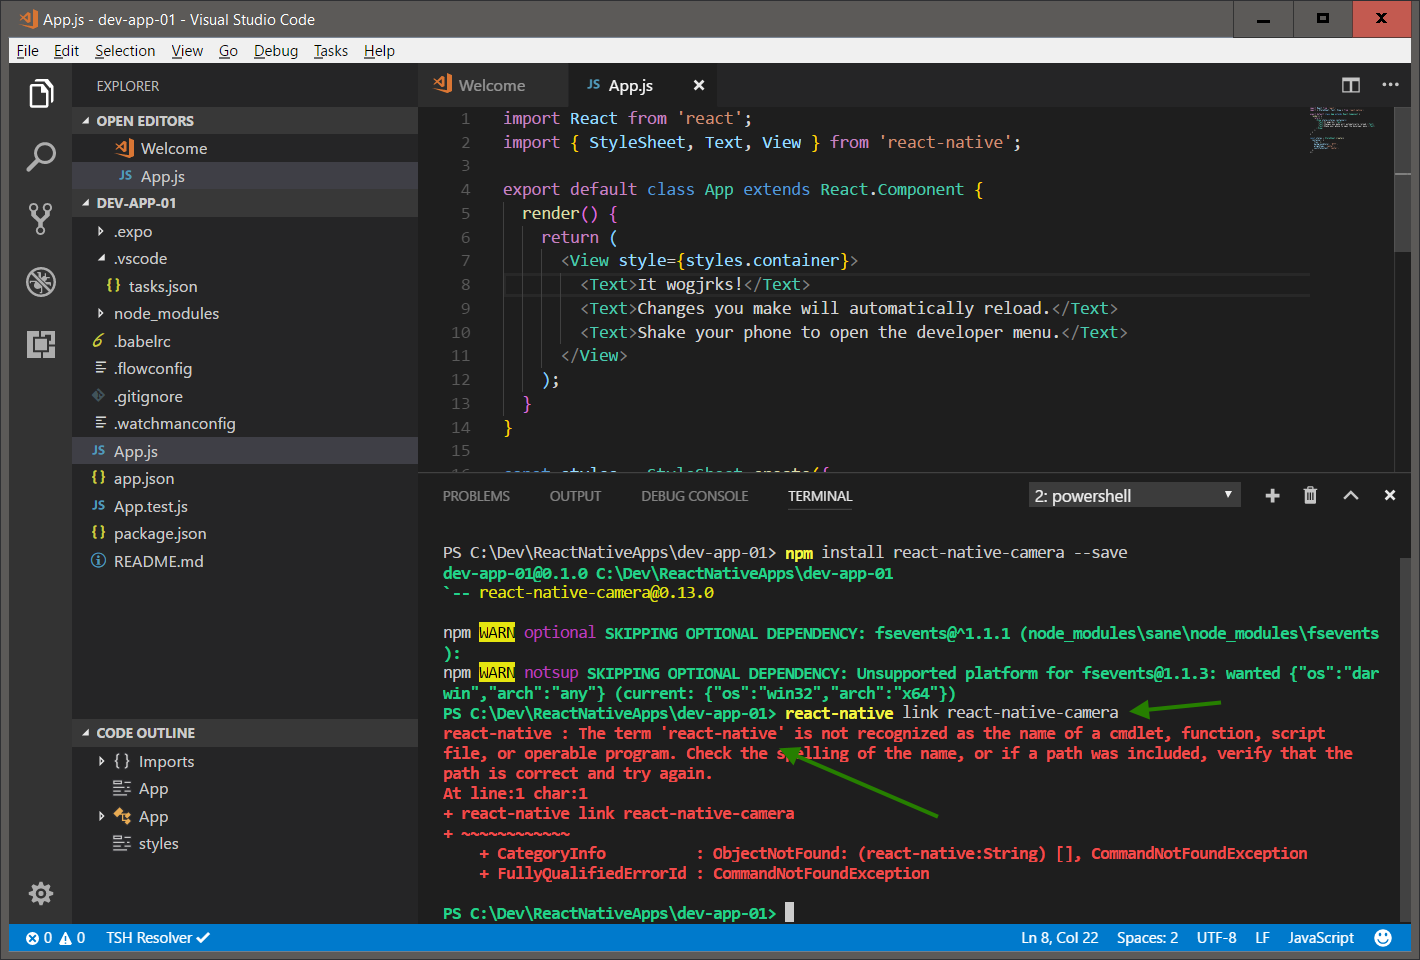
> npm install react-native-camera --save
That should work
> react-native link react-native-camera
And the first Error #1
The term 'react-native' is not recognized
You need to install react native global
> npm install -g react-native-cli
And the next Error #2
`react-native link` can not be used in Create React Native App projects.
So let's go with the manual instructions at
First, to use native components, you have to 'eject' your project
Ejecting just means you can use native java and objective c code and components in your app
> npm run eject
Answer a few questions such as what's your project name.
I choose to not create an Expo account at this time, as uhg another account, and their site was not responding tonight. While using the Expo app on your phone is easier than manually copying your app from your notebook to your phone, the android emulator should work for now for quick testing.> npm start
And the next Error #3
will complain that you are running a react native app so now you have to start with android
trying again
> react-native run-android
And the next Error #4
SDK location not found. Define location with sdk.dir in the local.properties file or with an ANDROID_HOME environment variable.
So now you have to install android studio to get the android sdk
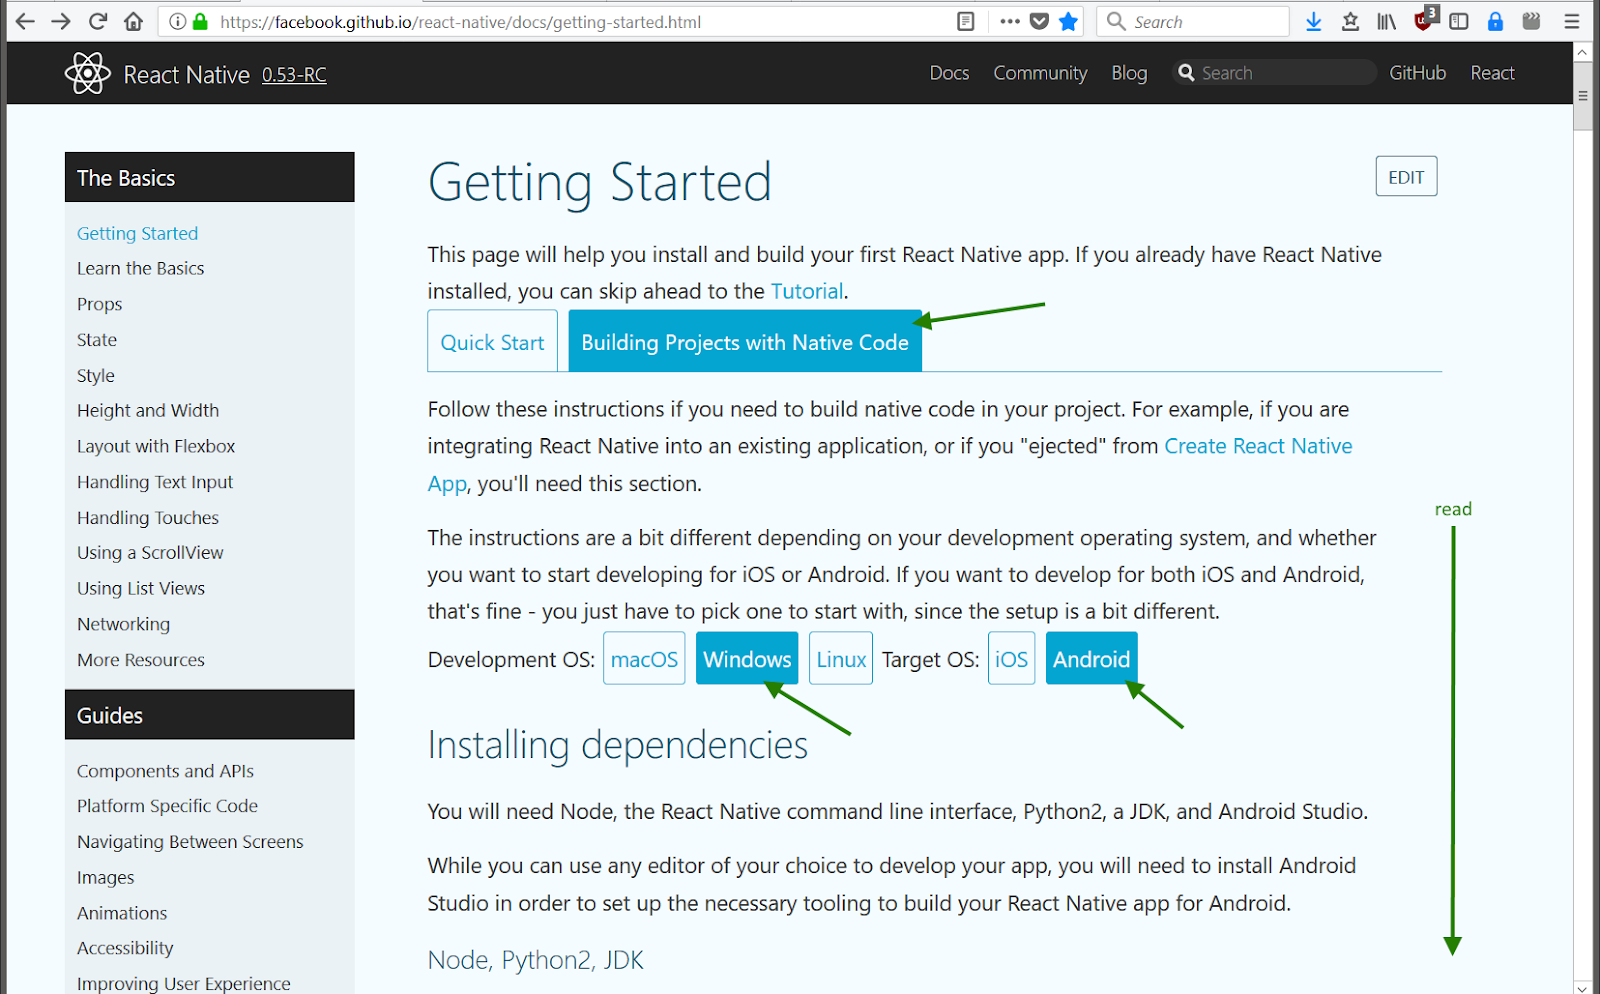
It's best to follow the full page of instructions at
Make sure you click the appropriate buttons
'Building Projects with Native Code'
'Windows'
'Android'
And then follow their lengthy instructions.
And the Error #4 again
SDK location not found. Define location with sdk.dir in the local.properties file or with an ANDROID_HOME environment variable.
Double check that you entered the PATH in Android Studio
But that still didn't work for me,
Make sure you click the appropriate buttons
'Building Projects with Native Code'
'Windows'
'Android'
And then follow their lengthy instructions.
- Download and install android studio (683MB + GBs for SDKs and emulators),
- Make sure you have the appropriate SDKs checked - the defaults worked for me
- And add a PATH variable
> react-native run-android
And the Error #4 again
SDK location not found. Define location with sdk.dir in the local.properties file or with an ANDROID_HOME environment variable.
Double check that you entered the PATH in Android Studio
But that still didn't work for me,
So I created a local.properties file in the android/ folder and added
> sdk.dir = C:/Users/[username]/AppData/Local/Android/sdk

trying again
> react-native run-android
And the next Error #5
Could not find tools.jar. Please check that C:\Program Files\Java\jre1.8.0_151 contains a valid JDK installation.
Which means you need to install the Java Development Kit aka JDK
Which makes sense as the java code will need to be compiled
Download and install the JDK
trying again
> react-native run-android
And the next Error #6
com.android.builder.testing.api.DeviceException: No connected devices!
Which means the android emulator needs to be running
So
Android Studio
Tools -> Android -> ADV Manager aka Android Virtual Device
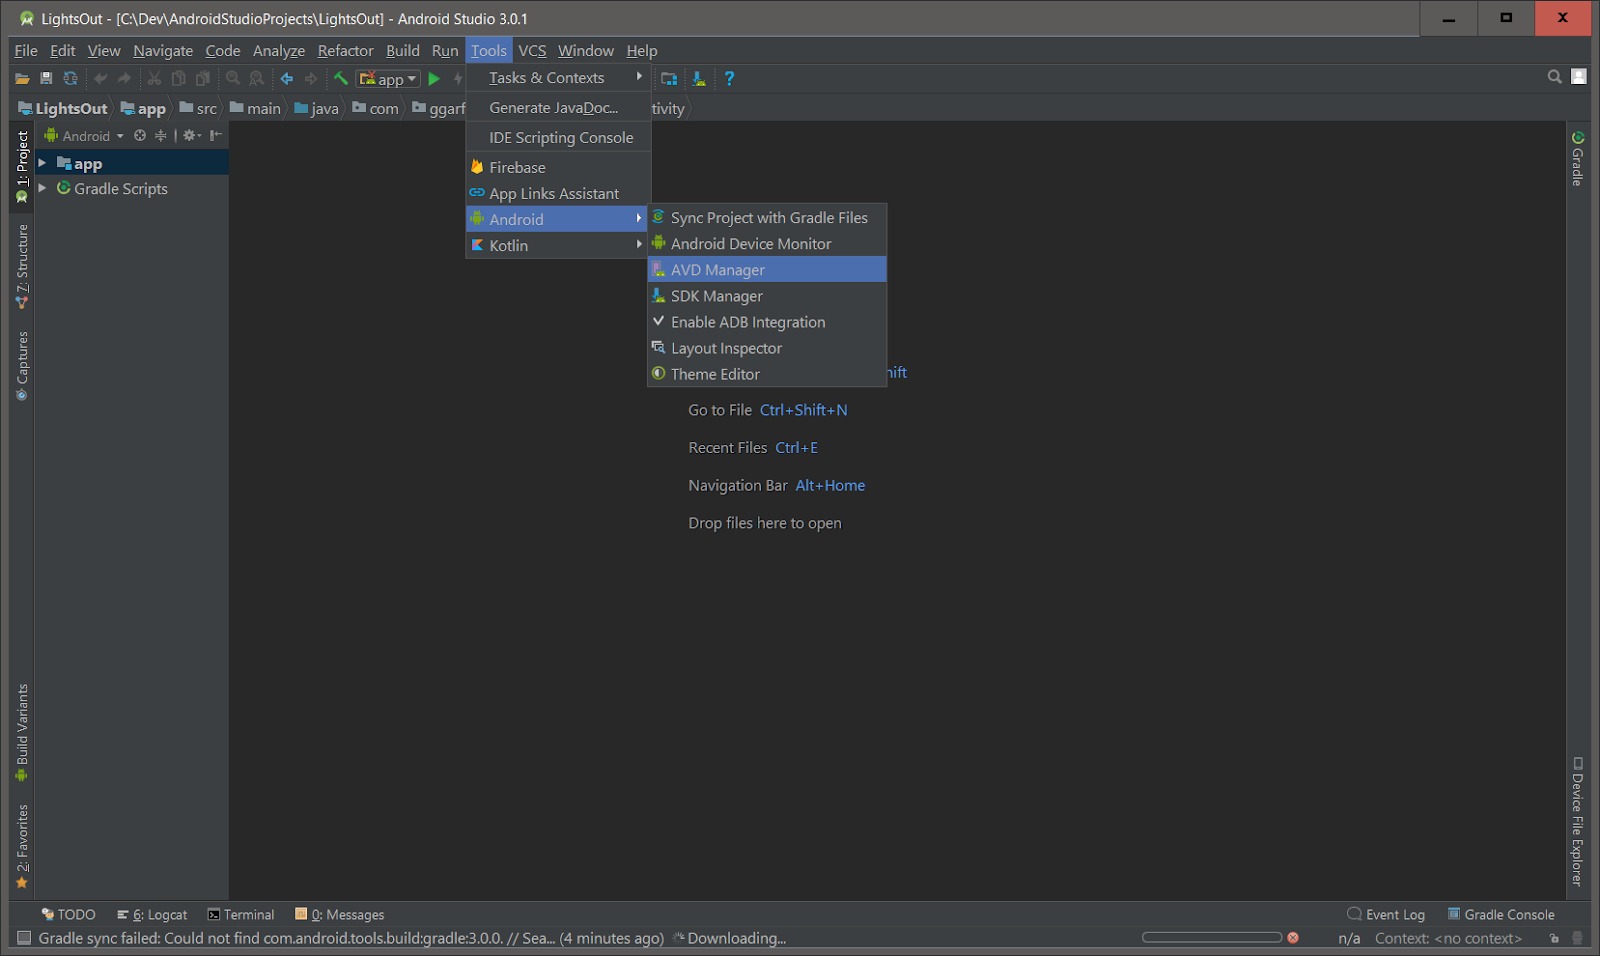
Create a new device
Choose Pixel 2 XL since that is fairly new
Next Next Next, just using the defaults

Click the Play button
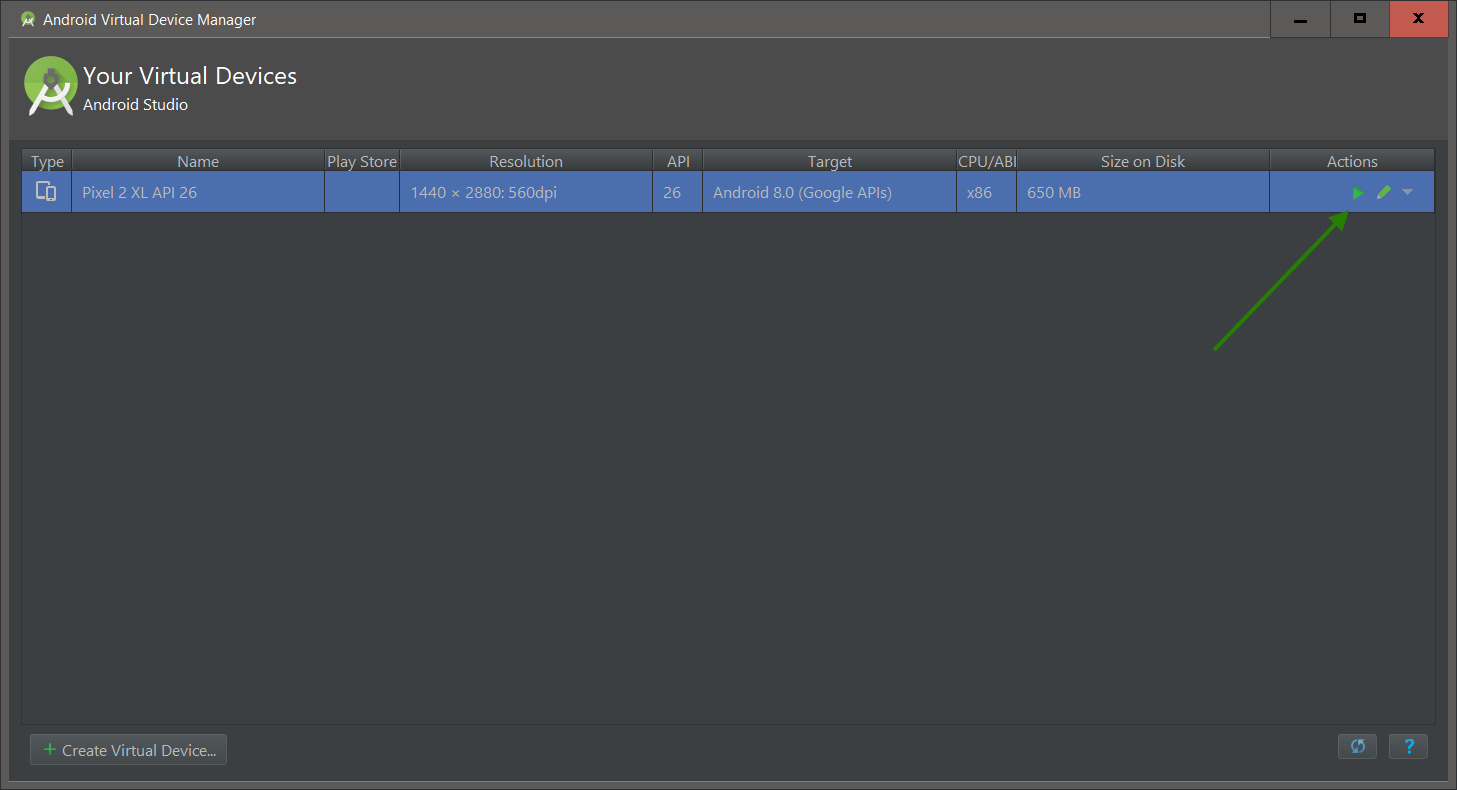
Wait for it..
And the android emulator should be running
trying again
> react-native run-android
Hmmm, no immediate errors
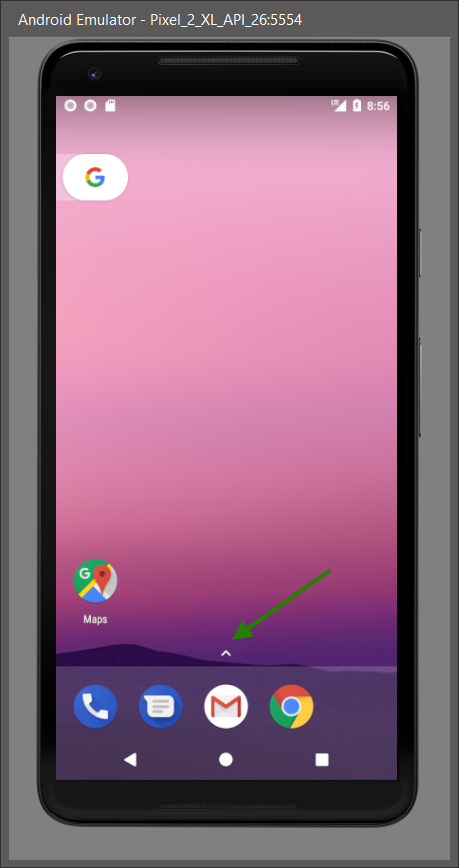
Click the app drawer (the up caret above the gmail icon)
Your app should be in the top right
Drag it to the home screen and click

And the next Error #7
Error: Couldn't find preset "babel-preset-react-native-stage-0/decorator-support" relative to directory
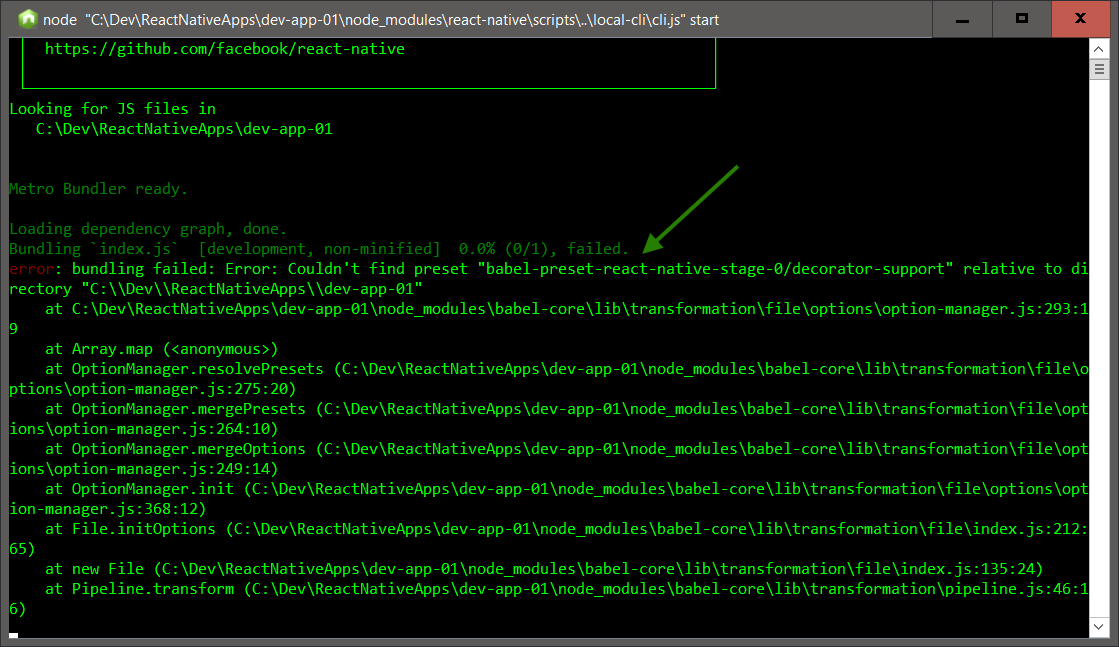
Note: Babel is a JavaScript transpiler. Babel enables us to write modern ES6/7 JavaScript that will be "transpiled" to widely-supported ES5 JavaScript.
So install the babel preset
> npm install babel-preset-react
> babel-preset-react-native-stage-0
trying again
> react-native run-android
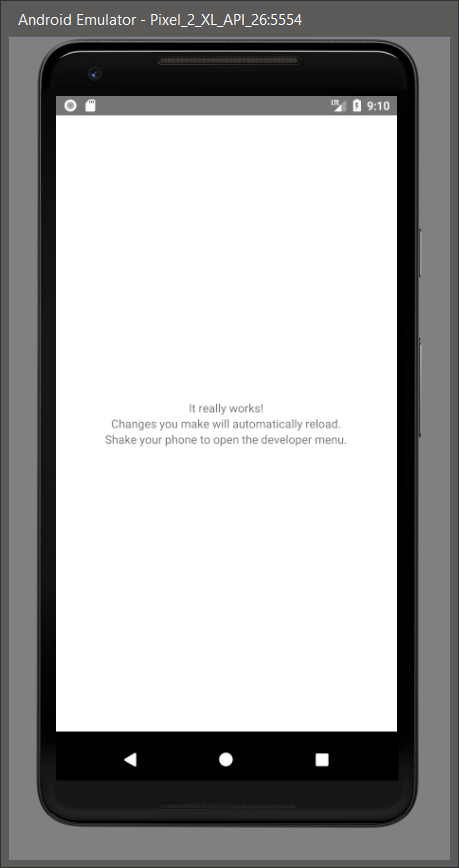
And the next Err .. no wait, it works!
Nice
With the android emulator window active, press Ctrl+M to bring up the react native context menu
Select Enable Hot Reloading

Make a change to some text in your app.js
And its updated in the phone app
Cool
OK, I didn't get to the actual camera part this time,
but there was a lot of environment initialization, and the basics seem to be working.
So till next time..
End of document. Thanks for reading.
thanks!!!
ReplyDelete