Showing posts with label PHP. Show all posts

Monday, August 21, 2023

DDEV for local development in containers

 DDEV

"DDEV is an open source tool for launching local [PHP, Python, NodeJS, etc] development environments in minutes. These environments can be extended, version controlled, and shared, so you can take advantage of a Docker workflow without Docker experience or bespoke configuration. Projects can be changed, powered down, or removed just as easily as they’re started."
GitHub | Docs

Terminology:

  • host os (windows/macosx/linux)
  • docker os (linux vm)
  • containers (linux)

General flow of ddev tech stack
[ddev, on host os] -> [docker compose -> docker, in linux vm] -> [containers, linux, managed by docker]


Install DDEV and related tools

Follow the install steps for your OS
https://ddev.readthedocs.io/en/stable/
Before running any external shell or powershell scripts, read the install script for your OS.

Prerequisites:

Windows

  • Recommended: use wsl2 and docker desktop, docker ce inside wsl (do your work mostly in windows)
  • Alternative: use wsl2, docker ce inside wsl (do your work mostly in wsl/linux)
  • Alternative: use virtual box, docker ce inside virtual box (do your work mostly in virtual box/linux)

Windows ides can access files in wsl2, but ide operations will be slower due to the different filesystems. Within wsl, for performance, do not reference files by /mnt/c/home/dev, instead use the linux file system, eg /home/dev or ~/

Install, update wsl
https://learn.microsoft.com/en-us/windows/wsl/install
https://learn.microsoft.com/en-us/windows/wsl/basic-commands

The ddev install uses chocolatey, a package manager for windows https://community.chocolatey.org/

Tip: Before installing ddev, you may want to change the default chocolatey tools install directory.
By default chocolatey installs itself to
C:\ProgramData\chocolatey and installs tools to C:\tools\ (not great)
In an admin powershell, run:
[System.Environment]::SetEnvironmentVariable('ChocolateyToolsLocation','C:\ProgramData\ChocolateyTools', 'User')


Installing docker desktop may require a logout/reboot.
Ensure docker desktop is using wsl2, launch docker desktop
configure gear icon -> general -> use wsl2 based engine; resources -> wsl integration

You shouldn't need to directly access docker desktop when using ddev.

MacOSX

  • Recommended: use colima, docker ce inside colima linux os (do your work mostly in macosx)
  • Alternative: use docker desktop, docker ce inside docker desktop linux os (do your work mostly in macosx)
  • Alternative: use virtual box, docker ce inside virtual box (do your work mostly in virtual box/linux)

You shouldn't need to directly use colima when using ddev.

Linux

  • Recommended: docker ce
  • Alternative: use docker desktop

DDEV Configuration

local config
a local config file can be used to merge with the main ddev config in .ddev/config.yaml

examples:

.ddev/config.local.yaml

hooks:

    post-start:

        - exec-host: echo -e "checking bootstrapping via \033[1;34mhttp://${DDEV_HOSTNAME}/ping\033[0m"

        - exec-host: curl http://your-repo.ddev.site/ping

        - exec-host: echo -e ""


ddev generated files
useful to see the docker config created by ddev.
do not edit as they will be re-generated on next start

.[dot folders] 

.ddev-docker-compose-base.yaml 

.ddev-docker-compose-full.yaml 


Related DDEV Utilities

mkcert
mkcert is a simple tool for making locally-trusted development certificates. eg allows local https without browser warnings
https://github.com/FiloSottile/mkcert

firefox
The non chrome browser
https://www.mozilla.org/en-US/firefox/new/
for ssl access to ddev sites, import the mkcert generated ca cert

  • list CA location, > mkcert -CAROOT
  • in firefox url, about:preferences#privacy
  • filter, certificates
  • View Certificates -> Authorities -> Import
  • Select the rootCA.pem file
  • find the imported cert in the list, find mkcert
  • click Edit Trust, click enable for websites

ngrok
ngrok is a reverse proxy that creates a secure tunnel from a public endpoint to a locally running web service eg expose a local server behind a NAT or firewall to the internet
https://ngrok.com/

chocolatey
a package manager for windows

docker
container management docker ce is opensource, docker desktop is a subscription
https://docs.docker.com/engine/install/ubuntu/

mutagen
mutagen provides real-time file synchronization and flexible network forwarding for developers, extending the reach of local development tools to cloud-based containers and infrastructure. initial file sync can take a bit https://mutagen.io/

maxosx and windows:
Accessing lots of files between the host os and linux os can be slow due to the different filesystems. mutagen will perform a two-way sync between your os and the ddev managed docker container.
https://ddev.readthedocs.io/en/stable/users/install/performance/#mutagen

traefik
dddev routing ddev-router has been based on a forked, poorly-documented nginx reverse proxy. Versions after DDEV v1.21.3 add a new router based on the popular Traefik Proxy.
https://ddev.readthedocs.io/en/latest/users/configuration/experimental/#traefik-router
https://traefik.io/traefik/

podman
container management, opensource, compatible with docker
https://podman.io/

phpstorm
php, code ide
https://www.jetbrains.com/phpstorm/
a ddev plugin exists for phpstorm and webstorm, which can facilitate setting up xdebug, server, php config, stop/start ddev, etc
https://ddev.readthedocs.io/en/latest/users/install/phpstorm/#phpstorm-basic-setup-on-windows-wsl2
using ddev from the command line may be simpler and more consistent

vscode
code ide
https://code.visualstudio.com/


General ddev, docker, and container tips

  • manage ddev within the host windows/macosx os, and if needed manage docker ce via the cli within the linux vm (wsl for windows)
  • one container per repo
    • changes inside container will not persist, as it is a container
    • any changes need to be made outside of container (code), or to ddev config (container services, config)
    • ddev configuration is stored in the relative directory .ddev/
    • to facilitate ddev updates, try to keep config changes to a minimal
  • start project
    > ddev start
    initial file sync can take a bit
  • stop project
    > ddev stop
  • project details
    > ddev status
    > ddev describe
  • list docker images
    inside linux host
    > docker ps
  • show all projects
    > ddev list
  • stop all containers
    > ddev poweroff
  • restart a project
    often used after making .ddev config changes
    > ddev restart
  • ddev images are debian based
    ssh into container to test or view config
    reminder, changes inside container will not persist
    > ddev ssh
  • control processes, php-fpm, nginx, node
    ddev uses supervisorctl to control processes, as opposed to systemctl; inside linux host
    > supervisorctl restart php-fpm
    > supervisorctl restart nginx
    note, if a process dies or attempts to restart several times due to bad config, the container will stop.
  • start npm run start command
    > ddev npm run start
  • stop npm run start command
    > ddev npm run stop
  • run phpstan
    > ddev composer phpstan
  • view logs from host os
    > ddev logs
  • view logs inside container
    > ddev ssh
    > vi [log]
    > tail -f [log]
  • docker maintenance
    Sometimes, either due to bad ddev, docker, wsl, comila, or normal config/docker changes, you may end up with unused, disconnected images, containers.
    To clean up your system, and recover some storage; inside your linux host
    > docker system prune
  • if ddev container won't start after config changes
    Fix or revert config changes, then
    > ddev restart
    "generally removes most things that need to be removed"
    > ddev poweroff
    > ddev rm -a
  • if start multiple ddev containers at the same time, there may be port conflicts as they may try to grab the same 'random' or initial default port; either restart failed container, or add a pause between container starts
  • check open ports in linux host
    > ss -l

 -End of Document- Thanks for reading

Monday, April 25, 2022

Exclude Code from Defender

If you are using Windows, or other OSes which have antivirus/malware scanners installed such as Windows Defender, you can increase the responsiveness and decrease the time taken for your code installs, transpiles, complies, etc by simply excluding your code from their scans.

Best practice, keep your versioned code in a common directory, such as

C:/Users/[user]/My Documents/ado/[repo-name]

or 

C:/dev/git/[repo-name]


And then simply exclude that directory from your antivirus/malware scanner(s).

An example for Windows Defender on Windows 10


After excluding your code directory, code installs such as npm, composer, nuget, maven, etc will not take as long and use much less resources eg cpu, disk i/o.

-End of Document-
Thanks for reading

Monday, March 21, 2022

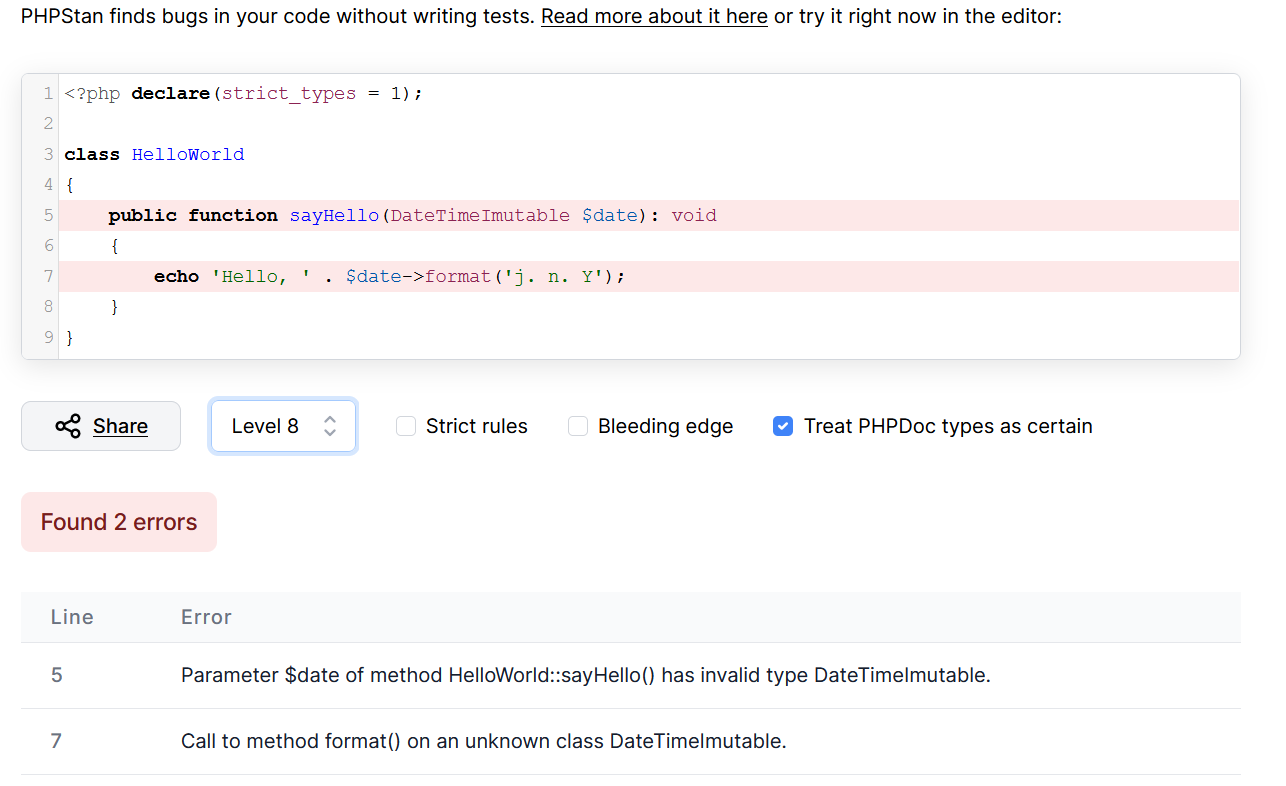
PHPStan - static analysis of PHP code

 'PHPStan finds bugs in your code without writing tests.' https://phpstan.org/

PHPStan performs static code analysis on your code.

Static analysis is the method of testing your code for basic logical, runtime or typographical exceptions without actually executing the code or accessing external services like databases

Static analysis of your codebase happens relatively fast since the code doesn't actually get executed but scanned for common errors, like having a method that doesn't return the expected date type.

PHPStan checks for a couple of language constructs such as use of instanceof, try-catch blocks, typehints, number of arguments passed to a function, accessibility of called methods and variables, and many more.

Install PHPStan

> composer require --dev phpstan/phpstan


Add helper script commands to composer.json

    "scripts": {

        "phpstan-dev": "php vendor/bin/phpstan analyse -c phpstan.neon --memory-limit=1G",

        "phpstan-ci": "php vendor/bin/phpstan analyse -c phpstan.neon --memory-limit=1G --no-progress",

...

    }


-c:
The configuration file phpstan.neon allows you to commit additional options for your project

--memory-limit=1G:
argument is to suppress a common false warning on runs which suggests that the errors are due to a memory limit;  projects often only consume tens to a couple hundreds of MB.

--no-progress:
omits the progress bar which could be useful for Continuous Integration runs.

Configuration

PHPStan makes use of the neon file format for its configuration, which is yaml like. 

An example configuration file, phpstan.neon:

# https://phpstan.org/config-reference

parameters:

    # https://phpstan.org/user-guide/rule-levels

    level: 8

    # code paths

    paths:

        - cfg

        - public

        - src

    excludePaths:

        analyse:

            - vendor

    tmpDir: tmp

    # https://phpstan.org/config-reference#vague-typehints

    checkMissingIterableValueType: false

    checkGenericClassInNonGenericObjectType: false

    # btr if true, but false allows changing level w/o errors

    reportUnmatchedIgnoredErrors: true

    ignoreErrors:

        - '#Negated boolean expression is always true\.#'

        - '#If condition is always false\.#'
...


level:
indicates how many tests to run
https://phpstan.org/user-guide/rule-levels

paths: 

should point to your code


excludePaths:

should exclude code you are not responsible for, such as vendor


tmpDir: 

if not set will use your default os tmp dir, but setting to a local tmp allows for easier cleanup, observation


ignoreErrors:

allows common code patterns in your project to be ignored by PHPStan

https://phpstan.org/user-guide/ignoring-errors

This should be used minimally, but may be necessary depending on your code.  It can also be used when adding PHPStan to an existing project with lots of errors and you want to ease PHPStan into your workflow.


reportUnmatchedIgnoredErrors:

shows you if you have any unused ignoreError expressions


Run PHPStan

Run using composer

> php composer phpstan-dev

php vendor/bin/phpstan analyse -c phpstan.neon --memory-limit=1G

...

------------------------------------------------------------------------------

  Line   src\Your\Service\AService.php

------------------------------------------------------------------------------

  15     Property App\Your\Service\AService::$aDomain has no typehint specified.

------------------------------------------------------------------------------

...

 [ERROR] Found 214 errors

 115/115 [============================] 100%

Script php vendor/bin/phpstan analyse -c phpstan.neon --memory-limit=1G handling the phpstan event returned with error code 1


Now the 'fun' begins.  The errors list the file name, method, and line number.  Go through all the reported errors and 'fix' them increasing code quality, and sometimes functionality; and only if necessary, add the error(s) to the ignore list.

Work toward the goal of no reported errors


> php composer phpstan-dev

php vendor/bin/phpstan analyse -c phpstan.neon --memory-limit=1G


 115/115 [============================] 100%


 [OK] No errors


Now celebrate!

And before every Push, Pull/Merge Request, run PHPStan.

Sounds like a good job for git hooks or CI huh?


-End of Document-

Thanks for reading


Monday, February 21, 2022

Enable PHP 8 xdebug from the command line

 "Xdebug is an extension for PHP, and provides a range of features to improve the PHP development experience. Step Debugging A way to step through your code in your IDE or editor while the script is executing."

Source: https://xdebug.org/ 

Install following the instructions from https://xdebug.org/docs/install

Note, PHP 8 settings are different than earlier versions of PHP, xdebug
For PHP 7 settings, see the prior post 
Enable PHP xdebug from the command line 

Download and place the xdebug extension in php\ext
C:\laragon8\bin\php\php-8.0.11-Win32-vs16-x64\ext

Configure your PHP 8 php.ini settings:

zend_extension=xdebug-3.0.4-8.0-vs16-x86_64

[xdebug]
xdebug.mode=debug
xdebug.start_with_request=yes
xdebug.client_host=127.0.0.1
xdebug.client_port=9081
xdebug.idekey=PHPSTORM 

Note, if you use xdebug.start_with_request=trigger, this may be more efficient for large code paths as xdebug should only be started when you send a request with XDEBUG_SESSION set, which can be set via xdebug helper for chrome or xdebug helper for firefox


You can also add arguments to your PHP call

> php -d -dxdebug.mode=debug -dxdebug.start_with_request=yes -dxdebug.client_host=127.0.0.1 -dxdebug.client_port=9081 -dxdebug.idekey=PHPSTORM your/script.php

The option -d can set/override php.ini values

-d foo[=bar]     Define INI entry foo with value 'bar'
Reference: https://www.php.net/manual/en/features.commandline.options.php


If you are using the conemu console you can add the alias to your settings -> startup -> environment

alias xphp8=C:/laragon80/bin/php/php-8.0.11-Win32-vs16-x64/php -dxdebug.mode=debug -dxdebug.start_with_request=yes -dxdebug.client_host=127.0.0.1 -dxdebug.client_port=9081 -dxdebug.idekey=PHPSTORM $*

alias php8=C:/laragon80/bin/php/php-8.0.11-Win32-vs16-x64/php $*

If you are using git for windows, which adds bash, you can also add the aliases
Edit your .bashrc
C:\Users\[youruser]\.bashrc

alias xphp8="C:/laragon80/bin/php/php-8.0.11-Win32-vs16-x64/php -dxdebug.mode=debug -dxdebug.start_with_request=yes -dxdebug.client_host=127.0.0.1 -dxdebug.client_port=9081 -dxdebug.idekey=PHPSTORM $*"

alias php8="C:/laragon80/bin/php/php-8.0.11-Win32-vs16-x64/php $*"


And use as

> xphp8 slimapp/cli.php arg1 arg2=test

Reference: Slim PHP CLI


-End of Document-
Thanks for reading


Monday, June 21, 2021

Add CORs headers to legacy apps

 
A simple way to add CORs headers to legacy apps:

But first, some definitions of what CORs and CORs preflight requests are:

"Cross-Origin Resource Sharing (CORS) is an HTTP-header based mechanism that allows a server to indicate any other origins (domain, scheme, or port) than its own from which a browser should permit loading of resources. CORS also relies on a mechanism by which browsers make a “preflight” request to the server hosting the cross-origin resource, in order to check that the server will permit the actual request. In that preflight, the browser sends headers that indicate the HTTP method and headers that will be used in the actual request."
Reference: https://developer.mozilla.org/en-US/docs/Web/HTTP/CORS

"CORS does not protect your server. CORS attempts to protect your users by telling browsers what the restrictions should be on sharing responses with other domains. Normally this kind of sharing is utterly forbidden, so CORS is a way to poke a hole in the browser's normal security policy. These holes should be as small as possible, so always check the HTTP_ORIGIN against some kind of internal list."
Reference: https://stackoverflow.com/questions/8719276/cross-origin-request-headerscors-with-php-headers

CORs preflight request:
"A CORS preflight request is a CORS request that checks to see if the CORS protocol is understood and a server is aware using specific methods and headers."
Reference: https://developer.mozilla.org/en-US/docs/Glossary/Preflight_request

"The Access-Control-Allow-Headers response header is used in response to a preflight request which includes the Access-Control-Request-Headers to indicate which HTTP headers can be used during the actual request."
Reference: https://developer.mozilla.org/en-US/docs/Web/HTTP/Headers/Access-Control-Allow-Headers

Note, developer tools will not show CORs preflight requests.

Now to the code:


function addCORSHeaders()
{
    if ($_SERVER['REQUEST_METHOD'] === 'OPTIONS') {
        // cors preflight check; doesn't care about content, just headers and status
        header('Access-Control-Allow-Origin: *');
        header('Access-Control-Allow-Methods: GET, POST, PUT, DELETE, PATCH, OPTIONS');
        header('Access-Control-Allow-Headers: X-Requested-With, Content-Type, Accept, Origin, Authorization');
        // cache of cors preflight check; max varies by browser; some only 10min, some 24hr
        header('Access-Control-Max-Age: 86400');
        header('Content-Length: 0');
        header('Content-Type: text/plain');
        // HTTP/1.1 or HTTP/1.0 or HTTPS/2.0 or etc
        header($_SERVER['SERVER_PROTOCOL'] . ' 200 OK');
        exit();
    }

    // if can, allow just your domain.com or allow just subdomains *.domains.com
    // but if have multiple shared apps/domains, * allow from anywhere
    header('Access-Control-Allow-Origin: *');
}


Add a function/method call to addCORSHeaders() to your middleware, or before your output.
 

Note, If your app has authentication, don't forget to allow OPTIONS as unauthenticated, like your login page.

You can check the network response to see the added headers in browsers developer tools.  

But as developer tools do not show CORs preflight requests, you may have to log access or trace using xdebug.


-End of Document-
Thanks for reading